
Identify low transmission fluid, prepare tools, locate reservoir, check levels, add recommended fluid, ensure proper refills, and complete the process correctly. Essential steps for maintaining your diesel vehicle’s transmission.
Identifying Low Transmission Fluid
Engine Stall During Driving
Have you ever noticed your car stalling or struggling to accelerate during driving? This could be a sign that your transmission fluid is low. Just like how blood circulates nutrients in our body, transmission fluid lubricates and cools the gears inside your transmission. When the fluid levels drop too low, it’s akin to trying to run a marathon without enough water – performance starts to suffer.
Imagine driving as if you’re swimming through thick syrup; that’s what it feels like when there isn’t enough transmission fluid. The engine stalls because the gears aren’t getting proper lubrication and can’t move smoothly. If this is happening, it’s a clear signal that your transmission needs attention, specifically focusing on checking and topping up the fluid level.
By addressing this issue early, you avoid more severe problems down the line, just like how taking care of minor health issues prevents bigger health crises.
Preparing for Transmission Fluid Change
Gather Necessary Tools and Equipment
Before you dive into changing your transmission fluid, it’s crucial to have all the necessary tools at hand. Think of this preparation step like gathering ingredients before starting a recipe – without them, your project might not go as smoothly! What tools will you need? Here’s a handy list:
- Jack and Jack Stands: To safely lift the vehicle.
- Catching Pan or Container: For catching old fluid.
- Socket Wrench Set: Essential for accessing tight bolts.
- Torque Wrench (if needed): To ensure your bolts are tightened properly to specification.
- Transmission Fluid Drain Plug Wrench: Specialized tool designed for this task.
- Gloves and Safety Gear: For protection during the process.
Now, imagine these tools as a symphony orchestra – each piece has its unique role. The jack and stands are like the bass drum, providing steady support; the catching pan is your cymbal, ready to capture any spills; and the socket wrench set acts like the strings, precise and versatile in their work. By preparing all of these tools beforehand, you ensure a smooth and efficient process, much like ensuring every member of an orchestra knows their part before performing.

Make sure to check if your vehicle manual specifies any particular tools or additional steps not listed here. This step might seem basic, but it’s crucial for setting the stage for success in changing your transmission fluid!
Locating the Transmission Fluid Reservoir
Position on Vehicle Model
When it comes to locating your transmission fluid reservoir, think of it like finding a hidden treasure in your car. Where exactly is this precious fluid hiding? In many cases, the transmission fluid reservoir shares space with the engine coolant reservoir, which can be confusing if you’re not familiar with their locations.
Position on Vehicle Model
In most vehicles, the transmission fluid reservoir is usually located near the firewall at the front of the vehicle or towards the middle, under the hood. Think of it like a small box attached to the side of your engine block. However, its exact position can vary significantly depending on the make and model of your car.
- For cars with automatic transmissions: The reservoir is often mounted near the firewall (the barrier between the passenger compartment and the engine bay), typically towards the left or right side, slightly ahead of where you might find the radiator.
- For cars with manual transmissions: The fluid reservoir can be found more centrally under the hood, close to the transmission pan.
In some vehicles, especially newer ones, the transmission fluid reservoir is integrated into a larger tank near the front or center of the engine bay. This makes it easier for maintenance but might require additional tools and techniques to access.
To locate your specific vehicle’s transmission fluid reservoir, you can refer to your car’s owner manual or consult with a professional mechanic if you’re unsure. It’s like using a map to find that hidden treasure—once you know where to look, the process becomes much clearer!
Checking Fluid Level Correctly
Visually Inspecting Fluid Level
Have you ever wondered how to ensure your vehicle’s transmission fluid is at just the right level? Visual inspection is often the first step in determining whether everything under the hood is in good shape. But where do you start, and what exactly are you looking for?
Firstly, let’s talk about the importance of this process. Transmission fluid acts like a lifeline to your car’s gearbox, ensuring smooth operation and preventing wear. Just like how a tree needs water to thrive, your transmission relies on the right amount of fluid to function efficiently.
When it comes to visually inspecting the fluid level, start by checking the reservoir. This might seem straightforward, but not all vehicles have the same location or type of reservoir. Some are easily visible and accessible, while others require you to climb under the car or even pop up the hood.
Once you’ve located the transmission fluid reservoir, take a moment to observe it closely. Look for any signs that indicate whether the fluid is low or high. A common sign is when the fluid level falls below the ‘add’ line on the side of the reservoir. But remember, it’s not just about the level; you should also check the color and consistency of the fluid.
Think of transmission fluid like blood in your body—it should be clear and clean. If it appears dark or milky, it might indicate contamination or degradation, both of which can cause serious issues down the road. So, keep an eye out for any unusual colors or textures during your inspection.
By following these steps, you’re not just checking a fluid level; you’re giving yourself peace of mind and ensuring your vehicle’s long-term health. After all, it’s always better to catch small problems early rather than dealing with major repairs later.

Adding Transmission Fluid Properly
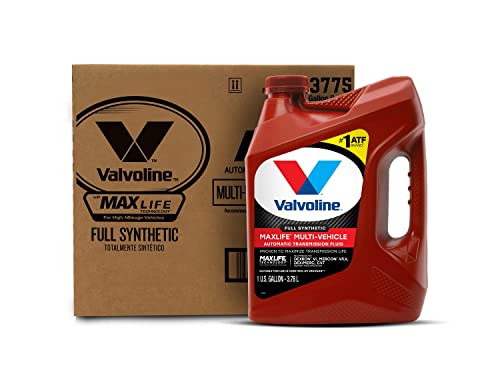
Using Recommended Fluid Type
When you’re topping up or changing your transmission fluid, it’s crucial to use the correct type of fluid. Just like ensuring that you put diesel in a diesel vehicle and not gasoline, using the wrong transmission fluid can lead to severe problems. The recommended fluid type is often specified by the manufacturer, usually listed in the owner’s manual or on the dipstick.
So, why does this matter so much? Think of your transmission as a delicate machine, similar to a finely tuned musical instrument. Each part has been carefully calibrated to work with specific fluids that provide the right balance between lubrication and performance. Using the wrong fluid is like trying to play a piano with drumsticks—things just won’t work right.
Before you start, check your owner’s manual or contact your vehicle’s manufacturer for the exact type of transmission fluid required. It might be something simple like Dextron II or something more specific depending on your vehicle model and year. Using the wrong fluid can cause premature wear and tear, damage seals, and even lead to a complete failure of the transmission.
To ensure you have the right fluid, look out for key information such as the viscosity grade (e.g., 75W-90) and any specific additives or characteristics that are required. Many manufacturers also recommend using synthetic fluids; these can offer better performance but might not be necessary unless your vehicle manual specifically calls for them.
Remember, it’s always best to use a fluid exactly as specified by the manufacturer. This small step in ensuring you have the right transmission fluid can save you from costly repairs down the line!
Ensuring Proper Fluid Level
Refilling to Safety Line
Once you’ve added the correct type of transmission fluid up to the safety line, it’s crucial to ensure that everything is just right. Think of this step as topping off a water bottle before a long hike—just enough to keep things running smoothly without overfilling.
To check if you’ve hit the sweet spot, locate the safety line on your transmission fluid reservoir. This marking typically indicates where the fluid should be when it’s in good condition and at the right level. If your vehicle has this feature, it’s like having a built-in guide to make sure you don’t need to worry about overfilling or underfilling.
Some vehicles may not have visible safety lines, which can feel a bit daunting. In these cases, consider using a dipstick if available. Insert the dipstick, pull it out, and check the fluid level against the marks on the stick. Just like when you’re checking your oil, make sure the fluid is within the recommended range.
If you’re unsure about how much to add or are dealing with an older vehicle that lacks these features, it’s a good idea to consult your owner’s manual. It can be like having a personal mechanic who guides you through each step of the process, ensuring everything is just right.
Remember, maintaining the proper fluid level in your transmission isn’t just about keeping it full; it’s about making sure you have the right amount for optimal performance. Just as you wouldn’t want to leave water halfway in a sports drink bottle before a race, ensure that your vehicle has enough transmission fluid for its journey.
Completing the Process
Wipe Clean and Check Seals
Once you’ve added the transmission fluid to the correct level, it’s time to wrap up the process. But don’t rush—there are a few final steps that will ensure everything is done right.
First things first, grab a clean cloth or a rag, and wipe off any excess fluid around the dipstick and filler neck area. This not only makes your work area neat but also helps prevent any spills or drips from leaving unsightly marks on your vehicle’s exterior.
Next, it’s crucial to check all seals for any signs of damage or wear. Think of these seals as the locks in a castle—the more they are intact and secure, the better protected everything is inside. In this case, if you notice any cracks or soft spots on the seals, now is the perfect time to address them. A small crack might seem insignificant, but it can lead to bigger issues down the line.
By taking these final steps—cleaning up and inspecting the seals—you’re essentially giving your transmission a thorough goodbye hug before it goes back to doing its job of keeping your car running smoothly. After all, just like making sure the locks on your house are secure, ensuring that your vehicle’s seals are tight is crucial for maintaining its performance.