
Learn the differences between brake cleaner and carburetor cleaner, including their purpose, chemical composition, and suitable applications. Find out how to use them safely and effectively, and explore eco-friendly alternatives for a cleaner environment.
Purpose of Brake Cleaner
Removing Brake Dust
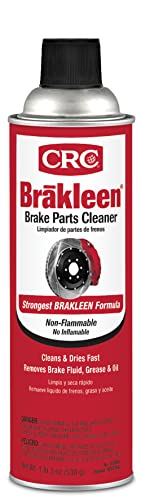
Brake cleaner is a vital tool in maintaining the performance and safety of your vehicle’s braking system. One of its primary purposes is to remove brake dust. Brake dust is a mixture of dirt, debris, and worn brake pad material that accumulates on the surface of the brake components over time. This buildup can negatively impact the braking performance and cause excessive wear on the brake system. Brake cleaner, with its powerful cleaning agents, effectively dissolves and removes brake dust, restoring optimal braking efficiency.
Cleaning Brake Components
In addition to removing brake dust, brake cleaner is also used for cleaning various brake components. The brake system consists of several parts, including brake calipers, brake rotors, and brake pads. Over time, these components can become contaminated with brake fluid, grease, and other substances that can hinder their performance. Brake cleaner is designed to penetrate and dissolve these contaminants, ensuring that the brake system operates smoothly and efficiently.
When using brake cleaner to clean brake components, it is important to follow the manufacturer’s instructions and use the appropriate cleaning method. Some brake cleaners are designed for spray application, while others may require wiping off residue with a clean cloth. By properly cleaning and maintaining your brake components with brake cleaner, you can prolong their lifespan, improve braking performance, and ensure the safety of your vehicle and its occupants.
Purpose of Carburetor Cleaner
Removing Fuel Deposits
The of carburetor cleaner is to effectively remove fuel deposits that can build up over time in the carburetor. These deposits can cause a range of issues, such as reduced fuel efficiency, poor engine performance, and even engine stalling. By using a carburetor cleaner, you can effectively dissolve and remove these deposits, restoring the proper functioning of your carburetor.
Cleaning Carburetor Parts
In addition to removing fuel deposits, carburetor cleaner is also used to clean the various parts of the carburetor. The carburetor is made up of several components, including the throttle plate, jets, and float bowl. Over time, these parts can become dirty and clogged, leading to a decrease in performance. Carburetor cleaner helps to break down and remove any dirt, grime, or varnish buildup, ensuring that each component is clean and able to function properly.

When using carburetor cleaner to clean carburetor parts, it’s important to follow the manufacturer’s instructions and take the necessary precautions. This may involve disassembling the carburetor to access the individual components and then using the cleaner to remove any buildup. It’s important to be thorough in this process, ensuring that all parts are cleaned and any debris is removed. By properly cleaning the carburetor parts, you can help to maintain the overall performance and longevity of your carburetor.
Overall, the of carburetor cleaner is to remove fuel deposits and clean carburetor parts, ultimately improving the performance and efficiency of your carburetor.
Types of Brake Cleaner
Brake cleaner is an essential product for maintaining the performance and safety of your vehicle’s braking system. It is designed to remove dirt, grime, brake dust, and other contaminants that can accumulate on the various brake components. There are two main types of brake cleaner available in the market: chlorinated brake cleaner and non-chlorinated brake cleaner. Let’s explore each type in more detail:
Chlorinated Brake Cleaner
Chlorinated brake cleaner contains chemicals such as methylene chloride or perchloroethylene, which are highly effective at dissolving grease, oil, and brake dust. This type of cleaner is known for its powerful degreasing properties, making it ideal for tackling heavy brake residue buildup. Chlorinated brake cleaner evaporates quickly, leaving no residue behind.
Here are some key features and benefits of chlorinated brake cleaner:
- Fast-acting: The chlorinated formula rapidly penetrates and breaks down tough brake dust and grime, saving you time and effort during cleaning.
- Strong degreaser: It effectively removes oil, grease, and other contaminants from brake components, ensuring optimal performance and safety.
- Evaporates quickly: Chlorinated brake cleaner dries within seconds, leaving no residue or moisture that could affect brake operation.
- Versatile: It can be used on a wide range of brake components, including calipers, rotors, pads, and drums.
While chlorinated brake cleaner offers excellent cleaning power, it is important to note that it poses certain risks. The chemicals used in this type of cleaner can be hazardous to human health and the environment. Therefore, it is crucial to follow proper safety precautions when using chlorinated brake cleaner.

Non-Chlorinated Brake Cleaner
Non-chlorinated brake cleaner is an alternative option that offers similar cleaning capabilities without the use of chlorinated solvents. Instead, it utilizes a blend of other cleaning agents, such as acetone or ethanol, to effectively remove brake dust and contaminants. Non-chlorinated brake cleaner is considered to be a safer and more environmentally friendly option.
Here are some advantages of non-chlorinated brake cleaner:
- Safer alternative: Non-chlorinated brake cleaner eliminates the health risks associated with chlorinated solvents, making it a preferable choice for those concerned about their well-being and the environment.
- Compatibility: It is safe to use on various brake components, including rubber, plastic, and painted surfaces.
- Reduced odor: Non-chlorinated brake cleaner typically has a milder odor compared to its chlorinated counterpart, providing a more pleasant user experience.
It is important to note that while non-chlorinated brake cleaner is generally safer to use, it may require more time and effort to remove stubborn brake dust and grime. However, when used correctly and with proper cleaning techniques, it can still deliver effective results.
Types of Carburetor Cleaner
When it comes to cleaning your carburetor, there are a few different types of cleaners to choose from. Each type has its own unique properties and benefits. In this section, we will explore two common types of carburetor cleaners: aerosol carburetor cleaner and soak carburetor cleaner.
Aerosol Carburetor Cleaner
Aerosol carburetor cleaner is a popular choice among car enthusiasts and mechanics. It comes in a convenient spray can, making it easy to apply directly to the carburetor. This type of cleaner is designed to quickly dissolve and remove deposits, varnish, and other gunk that can build up in the carburetor over time.
One of the advantages of aerosol carburetor cleaner is its ability to reach tight spaces and small crevices within the carburetor. The spray nozzle allows for precise application, ensuring that the cleaner can penetrate even the most hard-to-reach areas. This makes it an effective option for tackling stubborn deposits that may be obstructing the proper functioning of the carburetor.
To use aerosol carburetor cleaner, simply spray it onto the carburetor, paying special attention to areas where deposits are likely to accumulate, such as the throttle plates and idle jets. Allow the cleaner to sit for a few minutes to allow it to dissolve the deposits, and then wipe away the residue with a clean cloth or brush. Repeat the process if necessary.
Soak Carburetor Cleaner
Soak carburetor cleaner, as the name suggests, involves soaking the carburetor parts in a cleaning solution. This method is particularly useful for heavily soiled or clogged carburetors, as it allows the cleaner to penetrate deeply and dissolve tough deposits.
Using a soak carburetor cleaner typically involves disassembling the carburetor and placing the individual parts in a container filled with the cleaning solution. The carburetor parts should be fully submerged and left to soak for a specified period of time, as indicated by the manufacturer’s instructions. During the soaking process, the cleaner works to break down and remove any accumulated debris, varnish, or fuel deposits.
After the recommended soaking time has elapsed, the carburetor parts can be removed from the cleaning solution and rinsed thoroughly with water to remove any remaining cleaner residue. It is important to ensure that all parts are completely dry before reassembling the carburetor.
Soak carburetor cleaners are often available in concentrated form, which allows for multiple uses. This makes them a cost-effective option for those who frequently clean carburetors or work with multiple carburetors.
In summary, both aerosol carburetor cleaner and soak carburetor cleaner are effective options for cleaning carburetors. Aerosol cleaners offer convenience and precision, while soak cleaners provide a deep and thorough cleaning. The choice between the two depends on the level of deposits and the specific needs of your carburetor.
Differences between Brake Cleaner and Carburetor Cleaner
Chemical Composition
Brake cleaner and carburetor cleaner are two different types of cleaning solvents, each specifically designed for different purposes and applications. The main difference between these two cleaners lies in their chemical compositions.
Brake Cleaner: Brake cleaner is typically formulated with chemicals such as acetone, toluene, and methanol. These solvents are highly effective at breaking down and removing grease, oil, brake dust, and other contaminants from brake components. The chemical composition of brake cleaner is specifically designed to evaporate quickly, leaving no residue behind.
Carburetor Cleaner: On the other hand, carburetor cleaner is formulated with chemicals such as chlorinated solvents, trichloroethylene, and methylene chloride. These solvents are specifically designed to dissolve and remove fuel deposits, varnish, and other buildup that can accumulate in the carburetor. Carburetor cleaner is also designed to evaporate quickly, leaving no residue behind.
Suitable Applications
While both brake cleaner and carburetor cleaner are used for cleaning automotive parts, they are intended for different applications.
Brake Cleaner: Brake cleaner is primarily used for cleaning brake components such as brake calipers and brake rotors. Its powerful solvents effectively remove brake dust, oil, and other contaminants, ensuring optimal brake performance. Brake cleaner should not be used on rubber or plastic components as it can cause damage.
Carburetor Cleaner: Carburetor cleaner, as the name suggests, is specifically designed for cleaning carburetors. It effectively removes fuel deposits, varnish, and other buildup that can hinder the carburetor’s performance. Carburetor cleaner is also commonly used for cleaning other small engine parts, such as idle jets and float bowls.
It is important to note that brake cleaner and carburetor cleaner should not be used interchangeably. Using the wrong cleaner for a specific application can lead to damage or poor performance. It is always recommended to consult the manufacturer’s instructions or seek professional advice when choosing the appropriate cleaner for a specific cleaning task.
In summary, while brake cleaner and carburetor cleaner may seem similar at first glance, their chemical compositions and suitable applications set them apart. Understanding these is crucial for effectively and safely cleaning brake components and carburetors.
Safety Precautions when Using Brake Cleaner or Carburetor Cleaner
Brake cleaner and carburetor cleaner are powerful solvents that are commonly used for cleaning automotive parts. While these cleaners are effective at removing dirt, grease, and other contaminants, it is important to use them safely to avoid any potential risks. Here are some safety precautions to keep in mind when using or carburetor cleaner:
Proper Ventilation
One of the most important safety precautions to take when using brake cleaner or carburetor cleaner is to ensure proper ventilation. These cleaners contain volatile chemicals that can release fumes, which can be harmful if inhaled in large amounts or in a confined space. Here are some tips for ensuring proper ventilation:
- Always use these cleaners in a well-ventilated area, such as outdoors or in a garage with doors and windows open. This will help to dissipate any fumes and prevent them from accumulating.
- If working indoors, use a fan or open windows to increase air circulation and remove fumes.
- Avoid using brake cleaner or carburetor cleaner in enclosed or poorly ventilated spaces, such as basements or small rooms, as this can increase the concentration of fumes and pose a greater risk.
Avoiding Contact with Skin
In addition to inhalation risks, brake cleaner and carburetor cleaner can also be harmful if they come into contact with your skin. These solvents can cause skin irritation, dryness, or even chemical burns. To protect yourself from potential skin damage, follow these precautions:
- Wear protective gloves, such as nitrile or rubber gloves, when handling or carburetor cleaner. These gloves provide a barrier between the cleaner and your skin, reducing the risk of direct contact.
- If the cleaner does come into contact with your skin, immediately wash the affected area with soap and water. Avoid scrubbing vigorously, as this can further irritate the skin.
- If you experience any skin irritation or discomfort after using brake cleaner or carburetor cleaner, seek medical attention.
By following these safety precautions, you can minimize the risks associated with using brake cleaner or carburetor cleaner. Remember to always read and follow the instructions provided by the manufacturer, as they may include additional safety guidelines specific to the product.
How to Use Brake Cleaner
Brake cleaner is a vital tool for maintaining the performance and longevity of your braking system. Knowing how to use brake cleaner correctly can help you effectively remove brake dust and keep your brake components in optimal condition. In this section, we will explore the two main steps involved in using brake cleaner: spray application and wiping off residue.
Spray Application
When it comes to applying brake cleaner, the spray method is the most common and convenient. Follow these steps to ensure an effective application:
- Preparation: Before you begin, ensure that your vehicle is parked on a level surface and the engine is turned off. It’s also a good idea to put on protective gloves and safety goggles to prevent any contact with your skin or eyes.
- Identify the Brake Components: Familiarize yourself with the brake components you’ll be cleaning, such as the brake calipers and brake rotors. Understanding the specific areas where brake dust tends to accumulate will help you target your cleaning efforts.
- Shake the Brake Cleaner Can: Give the brake cleaner can a good shake to ensure that the contents are well-mixed. This will help maximize the cleaning power of the product.
- Spray the Brake Cleaner: Hold the brake cleaner can about 6 to 8 inches away from the targeted area, and aim the nozzle directly at the brake components. Press the nozzle to release a controlled burst of brake cleaner, covering the surface evenly.
- Allow the Cleaner to Penetrate: After spraying the brake cleaner, give it a moment to penetrate the brake dust and grime. This will help loosen the debris and make it easier to remove.
Wiping off Residue
Removing the residue left behind by the brake cleaner is an important step to ensure a thorough cleaning. Follow these steps to wipe off the residue effectively:
- Select a Clean Cloth: Choose a clean, lint-free cloth or shop towel to wipe off the residue. Avoid using materials that may leave lint or fibers behind, as these can interfere with the brake system’s performance.
- Gently Wipe the Brake Components: Begin by gently wiping the brake components, making sure to remove any visible residue. Use a back-and-forth motion to ensure thorough coverage.
- Inspect for Remaining Residue: After wiping off the initial residue, inspect the brake components closely for any remaining traces. If necessary, repeat the spray application and wiping process until the components are clean and free of residue.
- Dispose of the Used Cloth: Once you have finished cleaning, dispose of the used cloth properly. Brake cleaner residues can be flammable, so it’s important to handle and dispose of them responsibly.
Remember, proper ventilation and avoiding contact with the skin are crucial safety precautions when using brake cleaner. By following these steps for spray application and residue removal, you can effectively use brake cleaner to maintain the performance and longevity of your braking system.
How to Use Carburetor Cleaner
Carburetor cleaner is a crucial tool for maintaining the performance and efficiency of your carburetor. By following the correct steps, you can effectively clean your carburetor and ensure it functions optimally. Here, we will discuss the two main steps involved in using carburetor cleaner: disassembling the carburetor and soaking the carburetor parts.
Disassembling the Carburetor
Before you can clean your carburetor, it is essential to disassemble it properly. This step allows you to access all the intricate components and remove any built-up dirt, debris, or fuel deposits effectively. Here’s a step-by-step guide to disassembling your carburetor:
- Gather the necessary tools: To disassemble your carburetor, you will need a socket set, screwdrivers, and a carburetor cleaner.
- Turn off the engine: It is crucial to ensure that the engine is turned off and cool before attempting to disassemble the carburetor. This will prevent any accidents or injuries.
- Locate the carburetor: The carburetor is typically located on the top or side of the engine. Refer to the owner’s manual or consult a professional if you are unsure about its exact location.
- Remove the air cleaner: Start by disconnecting the air cleaner housing and removing the air filter. This will provide better access to the carburetor.
- Disconnect the fuel line: Locate the fuel line connected to the carburetor and carefully disconnect it. Be cautious as there may be some fuel spillage.
- Remove the carburetor: Using the appropriate tools, loosen and remove the bolts or screws that secure the carburetor to the intake manifold. Gently lift the carburetor away from the engine.
- Take note of the carburetor’s orientation: Before disassembling the carburetor further, take a moment to observe and remember the orientation of the various components. This will help during reassembly.
- Disassemble the carburetor: Now that the carburetor is removed, you can disassemble it by removing the screws or clips that hold the different parts together. Take care not to damage any delicate components.
Soaking the Carburetor Parts
Once you have successfully disassembled the carburetor, the next step is to soak the carburetor parts in a carburetor cleaner solution. This process helps to remove stubborn deposits, varnish, and other contaminants that may be affecting the carburetor’s performance. Here’s how to effectively soak the carburetor parts:
- Choose a suitable carburetor cleaner: There are various types of carburetor cleaners available, including aerosol carburetor cleaners and soak carburetor cleaners. Select the one that best suits your needs and follow the manufacturer’s instructions.
- Prepare the soaking container: Find a suitable container that is large enough to accommodate all the carburetor parts. Ensure that the container is made of a material that is safe to use with the carburetor cleaner.
- Submerge the parts: Place the disassembled carburetor parts into the container, making sure they are fully submerged in the carburetor cleaner solution. This will allow the cleaner to penetrate and dissolve any deposits or contaminants.
- Follow the recommended soaking time: The carburetor cleaner manufacturer will provide instructions on the recommended soaking time. It is essential to adhere to these guidelines to achieve the best results. Typically, soaking times can range from a few minutes to several hours.
- Agitate the parts: During the soaking process, it is beneficial to agitate the carburetor parts gently. This can be done by swishing them around in the cleaner or using a soft brush to dislodge any stubborn deposits.
- Rinse the parts: After the recommended soaking time has elapsed, remove the carburetor parts from the cleaner and rinse them thoroughly with clean water. This will help remove any remaining cleaner and ensure that no residue is left behind.
- Inspect and dry the parts: Once rinsed, carefully inspect each part for cleanliness and any signs of damage. Allow the parts to air dry completely before reassembling the carburetor.
By following these steps, you can effectively use carburetor cleaner to disassemble and clean your carburetor. Remember to always refer to the manufacturer’s instructions for the specific carburetor cleaner you are using, as different products may have slightly different procedures.
Cleaning Brake Components with Brake Cleaner
Brake components play a crucial role in ensuring the safety and performance of your vehicle’s braking system. Over time, brake calipers and brake rotors can accumulate dirt, grime, and brake dust, compromising their effectiveness. This is where brake cleaner comes to the rescue.
Brake Calipers
Brake calipers are responsible for applying pressure to the brake pads, which then press against the brake rotors to slow down or stop your vehicle. However, due to their location behind the wheels, calipers are prone to collecting dust, debris, and even road salt.
To clean brake calipers effectively, follow these steps:
- Start by lifting the vehicle and removing the wheels to gain access to the brake calipers.
- Spray generously onto the calipers, ensuring complete coverage.
- Allow the cleaner to penetrate and dissolve any built-up grime for a few minutes.
- Use a brush or toothbrush to scrub away the loosened dirt, paying close attention to crevices and hard-to-reach areas.
- Wipe off the residue with a clean cloth or rag.
- Repeat the process if necessary, especially for heavily soiled calipers.
- Once the calipers are clean, visually inspect them for any signs of damage or wear. Replace them if needed.
Regularly cleaning your brake calipers not only enhances their appearance but also helps maintain their functionality, prolonging their lifespan and ensuring optimal braking performance.
Brake Rotors
Brake rotors, also known as brake discs, provide a flat surface for the brake pads to grip onto when you apply the brakes. However, constant friction can lead to the accumulation of brake dust and other contaminants on the rotor surface, hindering their ability to dissipate heat effectively.
To clean brake rotors effectively, follow these steps:
- Lift the vehicle and remove the wheels to expose the brake rotors.
- Spray brake cleaner onto the rotors, focusing on the areas with visible dirt or debris.
- Allow the cleaner to soak for a few minutes to break down any grime.
- Use a clean cloth or rag to wipe off the loosened dirt, ensuring all surfaces are thoroughly cleaned.
- Inspect the rotors for any signs of warping, scoring, or uneven wear. Replace them if necessary.
- Before reassembling the wheels, make sure the rotors are completely dry to prevent any brake noise or issues.
Cleaning your brake rotors regularly not only improves their performance but also helps prolong the life of your brake pads, as they will have a clean surface to make contact with.
Remember, safety should always be a priority when working with brake components. If you’re unsure or uncomfortable performing these cleaning tasks yourself, it’s best to consult a professional mechanic.
Cleaning Carburetor Parts with Carburetor Cleaner
Idle Jets
Carburetors are complex devices that play a crucial role in the functioning of an engine. One of the key components of a carburetor is the idle jet, which controls the flow of fuel at low engine speeds. Over time, idle jets can become clogged with deposits and dirt, resulting in poor engine performance and rough idling.
To clean the idle jets effectively, carburetor cleaner is the go-to solution. Its powerful formula is specifically designed to dissolve and remove stubborn deposits, allowing for optimal fuel flow. Here’s a step-by-step guide on how to clean the idle jets using carburetor cleaner:
- Remove the carburetor: Before cleaning the idle jets, it is important to remove the carburetor from the engine. This ensures easy access and prevents any accidental damage to other delicate parts.
- Identify the idle jets: The idle jets are small brass orifices located within the carburetor. They can usually be found near the throttle plate or in a separate idle circuit.
- Spray carburetor cleaner: Holding the carburetor cleaner can upright, carefully spray the cleaner directly into the idle jets. The powerful solvent will dissolve any deposits and dirt, effectively unclogging the jets.
- Allow the cleaner to work: After spraying the carburetor cleaner, it is important to let it sit for a few minutes. This allows the cleaner to penetrate and dissolve the deposits thoroughly.
- Flush with compressed air: To ensure a thorough cleaning, use compressed air to blow out any remaining debris from the idle jets. This helps in removing any loosened particles that may have been dislodged by the cleaner.
- Reassemble the carburetor: Once the cleaning process is complete and the idle jets are free from deposits, carefully reassemble the carburetor and reinstall it back into the engine.
Float Bowl
Another crucial component of a carburetor is the float bowl, which houses the fuel for the carburetor. Over time, the float bowl can accumulate sediment, fuel deposits, and varnish, leading to fuel flow issues and poor performance. Cleaning the float bowl with carburetor cleaner is essential to maintain the efficiency of the carburetor. Here’s how you can effectively clean the float bowl using carburetor cleaner:
- Remove the carburetor: Before cleaning the float bowl, it is important to remove the carburetor from the engine. This ensures easy access and prevents any accidental damage to other delicate parts.
- Drain the float bowl: To start the cleaning process, carefully drain the fuel from the float bowl. This can usually be done by loosening the drain screw located at the bottom of the bowl.
- Spray carburetor cleaner: Holding the carburetor cleaner can upright, liberally spray the cleaner onto the float bowl. Ensure that the cleaner reaches all areas, including the walls, fuel inlet, and float mechanism.
- Allow the cleaner to work: After spraying the carburetor cleaner, allow it to sit for a few minutes. This gives the cleaner enough time to dissolve the sediment, fuel deposits, and varnish present in the float bowl.
- Scrub with a brush: To remove stubborn deposits, use a small brush or toothbrush to scrub the inside of the float bowl. This helps in dislodging any remaining debris and ensures a thorough cleaning.
- Rinse and dry: Once the scrubbing is complete, rinse the float bowl with clean water to remove any traces of the cleaner. After rinsing, thoroughly dry the float bowl before reassembling it with the carburetor.
By following these steps, you can effectively clean the idle jets and float bowl of a carburetor using carburetor cleaner. Regular maintenance and cleaning of these components will ensure optimal engine performance and longevity. Remember to always follow the manufacturer’s instructions and wear appropriate safety gear when working with any chemicals or engines.
Environmental Impact of Brake Cleaner and Carburetor Cleaner
Proper Disposal Methods
Proper disposal of brake cleaner and carburetor cleaner is crucial to minimize their environmental impact. These cleaning products often contain hazardous chemicals that can harm the environment if not disposed of correctly. Here are some recommended disposal methods:
- Follow local regulations: Check with your local waste management authorities to understand the specific guidelines for disposing of brake cleaner and carburetor cleaner. Different regions may have different regulations, so it’s important to comply with the rules in your area.
- Recycle or take to a hazardous waste facility: If possible, recycle the empty containers of the cleaners. Some recycling centers accept hazardous materials like these cleaners. Alternatively, you can take them to a designated hazardous waste facility for proper disposal.
- Avoid pouring down the drain: Never pour or carburetor cleaner down the drain or toilet. These products can contaminate water sources and harm aquatic life. Instead, choose one of the recommended disposal methods to ensure the chemicals are handled safely.
- Seal containers securely: When disposing of partially used containers, make sure to seal them securely to prevent any leakage. This will help minimize the risk of spills or accidents during transportation and disposal.
Eco-Friendly Alternatives
To reduce the environmental impact of brake cleaner and carburetor cleaner, consider using eco-friendly alternatives. These alternatives are designed to be safer for both the environment and human health. Here are some options to explore:
- Water-based cleaners: Look for water-based cleaners that are formulated without harsh chemicals. These cleaners use water as the main solvent, reducing the reliance on hazardous substances. They are often biodegradable and less harmful to the environment.
- Bio-based cleaners: Bio-based cleaners are made from renewable resources such as plant oils or other natural ingredients. They are typically free from toxic chemicals and have a lower environmental impact compared to traditional cleaners.
- Environmentally-friendly aerosol alternatives: Some companies offer aerosol cleaners that are specifically designed to be environmentally friendly. These products use propellants that have a reduced impact on the ozone layer and are less harmful to the environment.
- DIY alternatives: In some cases, you can create your own eco-friendly cleaning solutions using simple household ingredients. For example, a mixture of vinegar and water can be used as a general-purpose cleaner. However, ensure that these DIY alternatives are suitable for the specific cleaning tasks and components you are working with.
By following proper disposal methods and exploring eco-friendly alternatives, you can minimize the environmental impact of brake cleaner and carburetor cleaner. Taking these steps not only helps protect the environment but also promotes a safer and more sustainable approach to cleaning automotive components.