
Discover the of low engine oil pressure and learn how to fix it. From checking the oil level to changing the oil filter, replacing the oil pump, and repairing engine bearings, we’ve got you covered.
Causes of Low Engine Oil Pressure
Low engine oil pressure can be a cause for concern as it indicates that the lubrication system in your vehicle is not functioning properly. Several factors can contribute to low engine oil pressure, and it is important to address them promptly to avoid potential damage to your engine. In this section, we will explore some common of low engine oil pressure and discuss how they can be identified and resolved.
Insufficient Oil Level
One of the primary of low engine oil pressure is an insufficient oil level. Your engine relies on an adequate amount of oil to lubricate its moving parts and prevent excessive friction and heat buildup. If the oil level is too low, the oil pump may struggle to circulate enough oil, resulting in low oil pressure.
To check the oil level, locate the oil dipstick, usually marked with a bright-colored handle. Pull out the dipstick and wipe it clean with a cloth or paper towel. Reinsert the dipstick fully and then pull it out again. The oil level should be between the minimum and maximum marks on the dipstick. If it is below the minimum mark, you will need to add more oil to bring it to the appropriate level.
Maintaining the proper oil level is crucial for the health of your engine. Regularly checking the oil level and topping it up when necessary can help prevent low oil pressure and potential engine damage.
Oil Pump Failure
Another possible cause of low engine oil pressure is oil pump failure. The oil pump is responsible for pumping oil throughout the engine, ensuring that all the moving parts are properly lubricated. If the oil pump malfunctions or fails, it may not be able to circulate enough oil, resulting in low oil pressure.

Identifying oil pump failure can be challenging, as it requires a thorough inspection of the engine. However, some signs that may indicate a faulty oil pump include low oil pressure warning lights or gauges, abnormal engine noises, and increased engine temperature.
If you suspect oil pump failure, it is crucial to address the issue promptly. This typically involves draining the engine oil, removing the old oil pump, and installing a new one. It is recommended to consult a professional mechanic for this task, as it requires specialized knowledge and tools.
Clogged Oil Filter
A clogged oil filter can also contribute to low engine oil pressure. The oil filter plays a vital role in removing impurities and contaminants from the oil, ensuring that only clean oil reaches the engine. Over time, the oil filter can become clogged with debris, reducing the flow of oil and causing low oil pressure.
To change the oil filter, gather the necessary tools and supplies, including a new oil filter, an oil filter wrench, and a drain pan. The location of the oil filter may vary depending on the make and model of your vehicle, but it is usually found near the engine.
Begin by draining the engine oil into the drain pan. Once the oil has fully drained, use the oil filter wrench to loosen and remove the old oil filter. Be careful not to spill any oil during this process. Before installing the new oil filter, apply a thin layer of oil to the rubber gasket to ensure a proper seal. Hand-tighten the new oil filter, being careful not to overtighten it.
Regularly changing the oil filter is essential for maintaining proper oil pressure. Consult your vehicle’s manual or consult a professional mechanic to determine the recommended interval for oil filter changes.
Worn Out Engine Bearings
Worn out engine bearings can also contribute to low engine oil pressure. Engine bearings are responsible for supporting the rotating components of the engine, such as the crankshaft. Over time, these bearings can wear out due to factors like normal wear and tear, inadequate lubrication, or contamination.
Diagnosing worn out engine bearings typically involves inspecting the engine for signs of damage, such as excessive noise, vibration, or metal shavings in the oil. If worn out bearings are identified, they will need to be removed and replaced.
Replacing engine bearings is a complex task that requires specialized knowledge and tools. It involves disassembling the engine, removing the old bearings, and installing new ones. It is recommended to consult a professional mechanic for this repair to ensure it is done correctly.
Regularly maintaining proper oil levels, following the manufacturer’s recommended oil change intervals, monitoring for oil leaks, and addressing any leaks promptly can help prevent low engine oil pressure. It is important to prioritize the health of your engine by ensuring it is properly lubricated at all times.
In summary, low engine oil pressure can be caused by various factors, including insufficient oil level, oil pump failure, clogged oil filter, and worn out engine bearings. Regularly checking the oil level, changing the oil filter as recommended, and addressing any engine issues promptly can help maintain proper oil pressure and extend the life of your engine. Remember to consult a professional mechanic for any repairs or maintenance tasks beyond your expertise.
Checking the Oil Level
Checking the oil level in your car is an essential part of regular maintenance. By monitoring the oil level, you can ensure that your engine is properly lubricated, which is crucial for its smooth operation. In this section, we will discuss how to check the oil level, including locating the oil dipstick and checking the oil level on both a cold and warm engine.

Locating the Oil Dipstick
To check the oil level in your car, you will need to locate the oil dipstick. The oil dipstick is typically a long, thin metal rod with a loop or handle on one end. It is usually located near the front of the engine and has a brightly colored handle, making it easy to identify. Refer to your car’s owner’s manual for the exact location of the dipstick in your specific vehicle.
Checking the Oil Level on a Cold Engine
Checking the oil level on a cold engine is recommended because it allows the oil to settle, giving you a more accurate reading. Here’s how you can do it:
- Park your car on a level surface and turn off the engine.
- Open the hood of your car and locate the oil dipstick.
- Pull out the dipstick and wipe it clean with a cloth or paper towel.
- Reinsert the dipstick all the way back into the dipstick tube.
- Pull out the dipstick again and observe the oil level.
On the dipstick, you will find two markings or lines indicating the minimum and maximum oil levels. Ideally, the oil level should be between these two markings. If the oil level is below the minimum mark, it indicates that your engine is running low on oil and requires a top-up.
Checking the Oil Level on a Warm Engine
Checking the oil level on a warm engine is useful if you need to add or change the oil immediately. However, it is important to exercise caution as the engine and oil can be hot. Follow these steps to check the oil level on a warm engine:
- Start your car and let it idle for a few minutes to warm up the engine.
- Park your car on a level surface and turn off the engine.
- Open the hood of your car and locate the oil dipstick.
- Pull out the dipstick and wipe it clean with a cloth or paper towel.
- Reinsert the dipstick all the way back into the dipstick tube.
- Pull out the dipstick again and observe the oil level.
Similar to checking the oil level on a cold engine, ensure that the oil level is between the minimum and maximum markings on the dipstick. If the oil level is low, you may need to add oil to bring it up to the required level.
Remember, maintaining the proper oil level is crucial for the health and longevity of your engine. It is recommended to check the oil level regularly, especially before long trips or when you suspect a potential issue with your engine.
Incorporating the habit of checking your oil level can help you detect any potential problems early on and prevent more significant damage to your engine. By being proactive and ensuring the oil level is always within the recommended range, you can contribute to the smooth operation of your vehicle.
Summary
In this section, we discussed the importance of checking the oil level in your car. We covered how to locate the oil dipstick and provided step-by-step instructions on checking the oil level on both a cold and warm engine. By regularly monitoring the oil level and maintaining it within the recommended range, you can ensure that your engine stays properly lubricated and performs optimally. Remember, prevention is key when it comes to maintaining your car’s engine, so make it a habit to check your oil level regularly.
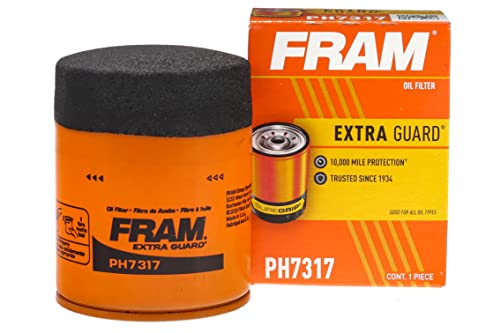
Changing the Oil Filter
When it comes to maintaining your engine’s health, changing the oil filter regularly is an essential task. Over time, the oil filter becomes clogged with dirt, debris, and contaminants, which can affect the efficiency and performance of your engine. In this section, we will guide you through the process of changing the oil filter step by step, ensuring that you have all the necessary tools and knowledge to complete the task successfully.
Gathering the Necessary Tools and Supplies
Before you begin changing the oil filter, it’s important to gather all the necessary tools and supplies. This will ensure that you have everything you need within reach, making the process smoother and more efficient. Here’s a list of items you’ll need:
- Oil filter wrench or a suitable tool for removal
- New oil filter
- Drain pan or container to catch the used oil
- Rags or paper towels for cleanup
- Safety goggles or gloves (optional but recommended)
By gathering these tools and supplies beforehand, you’ll save time and avoid any unnecessary interruptions during the oil filter change.
Locating the Oil Filter
Now that you have everything you need, it’s time to locate the oil filter. In most vehicles, the oil filter is located underneath the engine, near the oil pan. However, the exact location may vary depending on the make and model of your vehicle. Consulting your vehicle’s owner manual will provide you with the precise location of the oil filter.
Once you’ve located the oil filter, it’s important to ensure that you have enough clearance to access it comfortably. Sometimes, you may need to use a jack or ramps to raise the front of your vehicle slightly to create more space. Safety should always be a priority when working underneath a vehicle, so make sure to use appropriate precautions.
Removing the Old Oil Filter
With the oil filter located, it’s time to remove the old one. Before doing so, it’s crucial to take certain precautions to prevent any oil spills or mess. Placing a drain pan or container underneath the oil filter will catch any residual oil that may drip during the removal process.
To remove the old oil filter, you’ll need an oil filter wrench or a suitable tool. The filter is typically screwed onto the engine, and it may be tight due to the sealant. Using the oil filter wrench, turn it counterclockwise to loosen and remove the old oil filter. Be prepared for some oil to spill out, so ensure that the drain pan is positioned correctly.
Once the old oil filter is removed, inspect the area around it for any signs of damage or leaks. It’s important to ensure that the old filter’s rubber gasket came off with the filter. If it remains stuck to the engine, carefully remove it to prevent any leaks when installing the new filter.
Installing the New Oil Filter
With the old oil filter removed, it’s time to install the new one. Before doing so, take a moment to lubricate the rubber gasket of the new oil filter with a small amount of clean engine oil. This will help create a proper seal and make it easier to remove during the next oil change.
Once the gasket is lubricated, carefully screw the new oil filter onto the engine by hand. Ensure that you’re turning it clockwise, but avoid over-tightening it. Most oil filter manufacturers recommend tightening it by hand until the gasket contacts the engine, and then giving it an additional three-quarters to one full turn. This will ensure a proper and secure fit.
After installing the new oil filter, double-check that it is securely in place. Wipe away any excess oil or debris around the filter area using a rag or paper towel. This will help prevent any issues or leaks in the future.
Congratulations! You’ve successfully changed the oil filter in your vehicle. This simple maintenance task will go a long way in protecting your engine and ensuring its longevity. Remember to dispose of the used oil and old oil filter properly and in accordance with local regulations.
In the next section, we will explore the process of replacing the oil pump, another vital component of your engine’s oil system. Stay tuned!
Note: The information provided in this section is for general guidance only. Always consult your vehicle’s owner manual or seek professional assistance if you’re unsure or uncomfortable performing these tasks yourself.
Replacing the Oil Pump
Identifying the Location of the Oil Pump
Replacing the oil pump in your engine is an essential task to ensure proper lubrication and prevent damage to vital engine components. Before you can begin the replacement process, you need to identify the location of the oil pump. In most vehicles, the oil pump is located inside the oil pan, which is typically positioned at the bottom of the engine. However, it is important to consult your vehicle’s manual or seek professional advice to confirm the exact location of the oil pump in your specific make and model.
Draining the Engine Oil
Before you can remove the old oil pump, it is crucial to drain the engine oil completely. This step ensures that no oil spills or leaks occur during the replacement process. Start by placing a drain pan underneath the oil pan to catch the oil. Then, locate the oil drain plug, which is usually situated at the bottom of the oil pan. Unscrew the drain plug using a wrench and allow the oil to drain completely into the drain pan. Once the oil has drained, securely tighten the drain plug back into place.
Removing the Old Oil Pump
Now that the engine oil has been drained, it is time to remove the old oil pump. Begin by disconnecting any hoses or lines connected to the oil pump. Use a wrench or a socket set to loosen and remove the bolts securing the oil pump to the engine block. Gently wiggle the oil pump to loosen it from its position. Take care not to damage any surrounding components during this process. Once the old oil pump is detached, carefully remove it from the engine block and set it aside.
Installing the New Oil Pump
With the old oil pump removed, it is time to install the new one. Before proceeding, ensure that the new oil pump is compatible with your vehicle’s make and model. Begin by applying a small amount of oil to the gasket of the new oil pump. This helps create a tight seal and prevents leaks. Carefully position the new oil pump onto the engine block, aligning it with the mounting holes. Insert and tighten the bolts using a wrench or a socket set. Be sure to follow the manufacturer’s recommended torque specifications to ensure proper installation.
Once the new oil pump is securely in place, reconnect any hoses or lines that were disconnected earlier. Double-check all connections and ensure they are tight and secure. Now, you can proceed with the next steps in the oil pump replacement process or move on to other maintenance tasks.
Remember, if you are unsure about any step or encounter difficulties during the oil pump replacement process, it is always recommended to seek professional assistance. Proper installation of the oil pump is crucial for the overall health and performance of your engine, so it is essential to ensure it is done correctly.
Repairing Engine Bearings
Engine bearings play a crucial role in the smooth operation of a car’s engine. Over time, these bearings can wear out due to various factors. In this section, we will delve into the process of diagnosing worn-out engine bearings, removing them, installing new bearings, and reassembling the engine.
Diagnosing Worn Out Engine Bearings
Diagnosing worn-out engine bearings is essential to prevent further damage to the engine. Here are some signs that indicate the need for bearing replacement:
- Unusual Engine Noises: If you hear knocking or rumbling sounds coming from the engine, it could be a sign of worn-out bearings. These noises occur due to the metal-to-metal contact between the crankshaft and the worn-out bearings.
- Low Oil Pressure: Worn-out bearings can lead to a drop in oil pressure. Monitoring the oil pressure gauge is crucial, as low oil pressure can cause severe engine damage if left unattended.
- Vibrations and Increased Engine Heat: When bearings wear out, they can cause excessive vibrations in the engine. Additionally, you may notice an increase in engine heat as the bearings fail to properly distribute the lubricating oil.
If you observe any of these symptoms, it is advisable to have your engine inspected by a qualified mechanic to confirm the diagnosis of worn-out engine bearings.
Removing the Engine Bearings
Once the worn-out bearings have been diagnosed, it is necessary to remove them before proceeding with the replacement. Here is a step-by-step guide on how to remove engine bearings:
- Prepare the Engine: Ensure the engine is cool and turned off. Disconnect the battery and remove any components obstructing access to the bearings, such as the oil pan and connecting rods.
- Identify the Bearings: Locate the engine bearings, which are typically found between the crankshaft and the engine block. They may be secured with bearing caps.
- Remove the Bearing Caps: Carefully loosen and remove the bolts securing the bearing caps. Take note of their position and orientation, as this will be crucial during reassembly.
- Gently Tap the Bearings: Use a rubber mallet to gently tap the bearings and loosen them from the engine block. Be cautious not to cause any damage to the crankshaft or the engine block.
- Inspect the Bearings: Once removed, thoroughly inspect the bearings for signs of wear, such as scoring, discoloration, or pitting. This inspection will help determine the extent of the damage and whether replacement is necessary.
Installing New Engine Bearings
Now that the worn-out bearings have been removed, it is time to install new engine bearings. Here is a step-by-step guide on how to proceed with the installation:
- Prepare the New Bearings: Ensure that you have the correct replacement bearings that match the specifications of your engine. Apply a thin layer of engine oil to the new bearings to provide initial lubrication.
- Clean the Engine Block: Before installing the new bearings, clean the engine block thoroughly to remove any debris or contaminants. Use a lint-free cloth and an approved cleaning solution.
- Position the New Bearings: Carefully position the new bearings in their respective locations on the engine block. Ensure they are aligned correctly with the crankshaft.
- Apply Bearing Lubricant: Apply a generous amount of bearing lubricant to the new bearings. This lubricant will ensure proper lubrication and reduce friction during the engine’s operation.
- Torque the Bearing Caps: Place the bearing caps back in their original positions and torque the bolts according to the manufacturer’s specifications. Use a torque wrench to ensure accurate tightening.
Reassembling the Engine
With the new bearings successfully installed, it is time to reassemble the engine. Follow these steps to ensure a proper reassembly:
- Reattach the Connecting Rods: Carefully reattach the connecting rods to the crankshaft, ensuring they are correctly aligned. Use the marking or orientation notes taken during the bearing removal process.
- Install the Oil Pan: Reinstall the oil pan, making sure it is securely fastened. This will prevent any oil leaks and ensure proper lubrication of the new bearings.
- Reconnect Components: Reconnect any components that were removed to access the bearings, such as the battery and any other electrical connections.
- Refill with Engine Oil: Once the engine is reassembled, refill it with the recommended engine oil. Ensure the oil level is at the appropriate level by checking the dipstick.
By following these steps, you can successfully repair worn-out engine bearings and restore the smooth operation of your car’s engine. Remember to consult the manufacturer’s guidelines and seek professional assistance if needed.
Note: Always refer to your vehicle’s specific repair manual for detailed instructions tailored to your car’s make and model.
Maintaining Proper Oil Levels
Oil is the lifeblood of your engine, and maintaining proper oil levels is essential for its smooth operation and longevity. By regularly checking the oil level, following the manufacturer’s recommended oil change intervals, monitoring for oil leaks, and addressing any leaks promptly, you can ensure that your engine stays healthy and performs optimally.
Regularly Checking the Oil Level
One of the most important aspects of maintaining proper oil levels is regularly checking the oil level. This simple task can give you valuable insights into the health of your engine and help you detect any potential issues early on. To check the oil level, follow these steps:
- Locating the Oil Dipstick: The oil dipstick is usually located near the engine, often marked with a bright handle for easy identification. Refer to your vehicle’s owner’s manual if you’re having trouble locating it.
- Checking the Oil Level on a Cold Engine: It’s best to check the oil level when the engine is cold to get an accurate reading. Remove the dipstick, wipe it clean with a cloth, and reinsert it fully. Then, take it out again and observe the oil level. The dipstick usually has markings for the minimum and maximum oil levels. Ensure that the oil level is between these two marks.
- Checking the Oil Level on a Warm Engine: If you’ve been driving your vehicle recently, the engine will be warm. In this case, follow the same steps as checking on a cold engine, but wait a few minutes after turning off the engine to allow the oil to settle back into the oil pan. This will give you a more accurate reading.
Regularly checking the oil level allows you to identify any significant changes, such as a sudden decrease in oil level, which could indicate a leak or other underlying issues. It’s a simple task that can save you from costly repairs down the road.
Following the Manufacturer’s Recommended Oil Change Intervals
In addition to checking the oil level, following the manufacturer’s recommended oil change intervals is crucial for maintaining proper oil levels. The oil in your engine degrades over time due to heat, contaminants, and combustion by-products. Regular oil changes ensure that your engine is always supplied with clean and fresh oil, which helps prevent engine wear and damage.
To determine the recommended oil change intervals for your vehicle, refer to your owner’s manual or consult with a trusted mechanic. The recommended intervals can vary depending on factors such as the type of oil used, driving conditions, and the age of your vehicle. Generally, it’s advisable to change the oil every 3,000 to 5,000 miles or every three to six months, whichever comes first.
By following the manufacturer’s recommended oil change intervals, you can rest assured that your engine is running on clean oil, which promotes optimal performance and extends the life of your engine.
Monitoring for Oil Leaks
Oil leaks can lead to a decrease in oil levels and affect the overall health of your engine. Monitoring for oil leaks is an important part of maintaining proper oil levels. Here are some signs that may indicate an oil leak:
- Oil spots or stains on your garage floor or parking space
- The smell of burning oil while driving or after parking your vehicle
- Excessive oil consumption or the need to add oil frequently
- Visible oil dripping or pooling under the engine
If you notice any of these signs, it’s crucial to address the oil leak promptly to prevent further damage to your engine. Ignoring an oil leak can lead to low oil levels, inadequate lubrication, and increased friction, which can result in engine overheating and premature wear.
Addressing Any Oil Leaks Promptly
If you discover an oil leak, it’s important to address it promptly to maintain proper oil levels and preserve the health of your engine. Here are some steps you can take:
- Identifying the Source of the Leak: Start by locating the source of the oil leak. It could be a faulty gasket, a loose or damaged oil filter, a cracked oil pan, or other engine components. If you’re not comfortable identifying the source yourself, it’s best to consult with a professional mechanic.
- Assessing the Severity of the Leak: Determine the severity of the oil leak. If it’s a minor leak, you may be able to temporarily fix it using stop-leak additives or sealants. However, keep in mind that these are temporary solutions, and it’s advisable to have the underlying issue repaired by a professional.
- Seeking Professional Help: For significant oil leaks or if you’re unsure about the severity of the leak, it’s best to take your vehicle to a trusted mechanic. They have the expertise and tools to diagnose the problem accurately and provide the necessary repairs.
By addressing any oil leaks promptly, you can prevent low oil levels, engine damage, and costly repairs. Remember, maintaining proper oil levels is vital for the overall performance and longevity of your engine.
In conclusion, maintaining proper oil levels is crucial for the health and longevity of your engine. By regularly checking the oil level, following the manufacturer’s recommended oil change intervals, monitoring for oil leaks, and addressing any leaks promptly, you can ensure that your engine stays in optimal condition. Don’t neglect the importance of oil maintenance, as it can save you from costly repairs and keep your engine running smoothly for years to come.