
Looking to remove your catalytic converter? Follow our , complete with the necessary tools and safety precautions. We also cover how to reinstall the exhaust system for proper functionality.
Tools and Materials Needed for Removing a Catalytic Converter
Removing a catalytic converter requires the use of specific tools and materials to ensure a smooth and successful process. Here are the essential items you’ll need:
Socket Set
A socket set is a versatile tool that will come in handy when removing a catalytic converter. It consists of various socket sizes, allowing you to loosen and tighten bolts and nuts of different dimensions. Make sure to choose a socket set that includes the appropriate sizes for your specific vehicle.
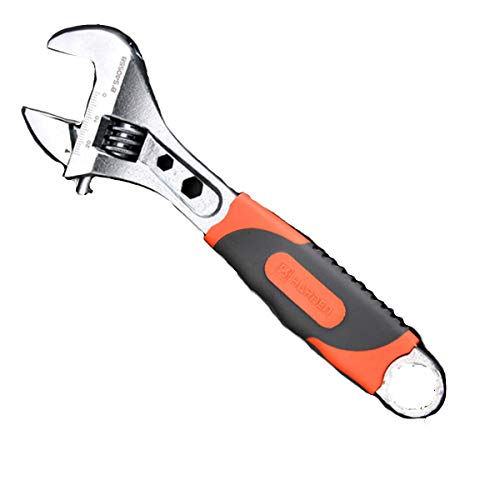
Wrench
Alongside a socket set, a wrench is another essential tool for catalytic converter removal. It provides a firm grip and torque, enabling you to loosen or tighten bolts and nuts. Like socket sets, wrenches come in various sizes, so ensure you have the right wrench size to fit your vehicle’s bolts and nuts.
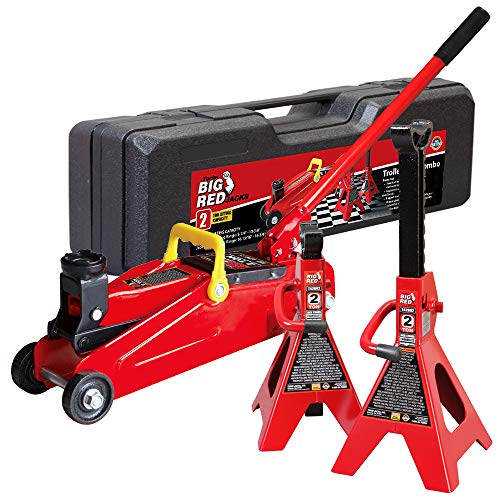
Jack and Jack Stands
To safely access and work on the underside of your vehicle, you’ll need a jack and jack stands. The jack is used to elevate the vehicle, while the jack stands provide stability and support once the vehicle is lifted. It’s crucial to follow proper lifting procedures and ensure the jack stands are securely in place before beginning any work.
Safety Glasses
Safety should always be a top priority when working on any automotive project. When removing a catalytic converter, it’s essential to protect your eyes from potential debris or harmful substances. Safety glasses provide a barrier between your eyes and any flying particles, ensuring your vision remains clear and safe throughout the process.
Penetrating Oil
Over time, bolts and nuts can become rusted or seized, making them challenging to remove. Penetrating oil is a valuable solution that helps loosen and lubricate these stubborn fasteners. By spraying the penetrating oil on the bolts or nuts before attempting to remove them, you increase the chances of success and minimize the risk of damaging the components.
In summary, the tools and materials listed above are crucial for a smooth and efficient catalytic converter removal. A socket set and wrench allow you to loosen and tighten bolts and nuts, while a jack and jack stands provide the necessary elevation and stability. Safety glasses protect your eyes from debris, and penetrating oil helps with the removal of rusted or seized fasteners. By ensuring you have these items on hand, you’ll be well-prepared to tackle the next steps in the catalytic converter removal process.
Preparation Steps for Catalytic Converter Removal
Removing a catalytic converter can be a daunting task, but with the right tools and preparation, it can be done successfully. In this section, we will outline the necessary steps to prepare for catalytic converter removal. By following these steps, you will ensure a smooth and efficient removal process.
Park the Vehicle on a Flat Surface
Before you begin removing the catalytic converter, it is crucial to park your vehicle on a flat surface. This will provide stability and prevent any accidental movement during the removal process. It is recommended to choose a location with ample space around the vehicle to ensure a safe working environment.
Allow the Exhaust System to Cool Down
Next, it is important to allow the exhaust system to cool down before attempting to remove the catalytic converter. The catalytic converter can reach extremely high temperatures during operation, and attempting to remove it while still hot can result in serious burns. Give the system sufficient time to cool down to a safe temperature before proceeding.
Put on Safety Glasses
Safety should always be a top priority when working on any automotive project. Before starting the catalytic converter removal, put on a pair of safety glasses to protect your eyes from any potential debris or particles that may be dislodged during the process. Safety glasses will shield your eyes from harm and ensure a safer working environment.
Secure the Vehicle with Jack Stands
To ensure stability and prevent any accidents, it is essential to secure the vehicle with jack stands. Jack stands provide a sturdy and reliable support system for the vehicle while you work underneath it. Place the jack stands at designated points on the vehicle’s frame or recommended lifting points to ensure maximum safety.
To summarize, preparation is key when it comes to removing a catalytic converter. By parking the vehicle on a flat surface, allowing the exhaust system to cool down, wearing safety glasses, and securing the vehicle with jack stands, you are taking the necessary steps to ensure a safe and successful removal process. Now that we have covered the preparation steps, let’s move on to the actual process of removing the catalytic converter.
(Table: Steps for Preparation)
| Preparation Steps for Catalytic Converter Removal |
|---|
| 1. Park the Vehicle on a Flat Surface |
| 2. Allow the Exhaust System to Cool Down |
| 3. Put on Safety Glasses |
| 4. Secure the Vehicle with Jack Stands |
Removing the Catalytic Converter
Removing the catalytic converter from your vehicle may seem like a daunting task, but with the right tools and a little know-how, it can be done. In this section, we will guide you through the step-by-step process of removing your catalytic converter safely and efficiently.
Locate the Catalytic Converter
Before you begin the removal process, it’s important to locate the catalytic converter on your vehicle. The catalytic converter is typically located in the exhaust system, between the engine and the muffler. It may be attached to the exhaust manifold or further down the exhaust pipe.

Spray Penetrating Oil on the Bolts or Nuts
To make the removal process easier, it’s a good idea to spray some penetrating oil on the bolts or nuts that secure the catalytic converter in place. This will help loosen any rust or corrosion that may have built up over time. Be sure to give the oil some time to work its magic before moving on to the next step.
Use a Socket Set or Wrench to Loosen the Bolts or Nuts
Once the penetrating oil has had a chance to work, it’s time to grab your socket set or wrench and start loosening the bolts or nuts that hold the catalytic converter in place. Depending on your vehicle, you may need to use different sizes of sockets or wrenches, so be sure to have a variety on hand.
Remove the Bolts or Nuts
With the bolts or nuts loosened, you can now remove them completely. It’s important to keep track of where each bolt or nut came from, as they may vary in size or length. Consider using a small container or a magnetic tray to keep them organized and prevent them from getting lost.
Wiggle the Catalytic Converter to Loosen it from the Exhaust System
Now that the bolts or nuts have been removed, it’s time to wiggle the catalytic converter to loosen it from the exhaust system. This may require some effort, as the catalytic converter can become stuck due to heat and corrosion. Gently rocking it back and forth should help free it from its position.
Slowly Lower the Catalytic Converter to the Ground
Once the catalytic converter is free, it’s time to slowly lower it to the ground. Be careful not to drop it or let it hit any other parts of the vehicle, as this could cause damage. It’s also important to note that catalytic converters can be heavy, so it may be helpful to have a friend assist you during this step.
Removing the catalytic converter is just one part of the process. In the next section, we will discuss the safety precautions you should take when handling the catalytic converter and how to properly dispose of it.
Safety Precautions for Catalytic Converter Removal
While removing the catalytic converter, it’s crucial to prioritize your safety and take necessary precautions. Here are some important safety measures to keep in mind:
Avoid Direct Skin Contact with the Catalytic Converter
Catalytic converters contain hazardous materials, such as platinum, palladium, and rhodium. These metals can be harmful if they come into direct contact with your skin. To protect yourself, it’s essential to wear gloves and avoid touching the catalytic converter with bare hands.
Dispose of the Catalytic Converter Properly
Catalytic converters are classified as hazardous waste due to the precious metals they contain. It’s crucial to dispose of them properly to prevent environmental harm. Check with your local authorities or recycling centers to find out the appropriate disposal methods in your area.
Follow Environmental Regulations
When handling a catalytic converter, it’s important to adhere to environmental regulations. These regulations are in place to protect our ecosystem and prevent pollution. Ensure that you dispose of the catalytic converter in a manner that complies with these regulations.
Wear Protective Gloves
As mentioned earlier, wearing protective gloves is essential to shield yourself from the harmful substances present in the catalytic converter. Choose gloves that are resistant to chemicals and provide adequate protection for your hands.
Protect the Eyes from Falling Debris
During the removal process, there may be debris or small particles that fall from the catalytic converter. To protect your eyes from potential harm, it’s recommended to wear safety glasses or goggles. These will prevent any debris from entering your eyes and causing injury.
Now that you know how to safely remove a catalytic converter and the precautions to take, it’s time to move on to the next step: reinstalling the exhaust system.
Safety Precautions for Catalytic Converter Removal
Avoid Direct Skin Contact with the Catalytic Converter
When removing a catalytic converter, it is important to avoid direct skin contact with the converter itself. The catalytic converter contains harmful substances such as platinum, palladium, and rhodium, which are used as catalysts to reduce emissions. These substances can be toxic and may cause skin irritation or other health issues if they come into contact with your skin.
To avoid direct skin contact, it is recommended to wear protective gloves. These gloves act as a barrier between your skin and the catalytic converter, preventing any potential harm. Furthermore, wearing protective gloves also provides grip and ensures a secure hold on the tools when removing the converter.
Dispose of the Catalytic Converter Properly
Proper disposal of the catalytic converter is essential to prevent any environmental harm. Catalytic converters contain precious metals that can be recycled and reused, so it is important to dispose of them responsibly. Improper disposal can lead to these valuable materials being wasted or ending up in landfills, causing further damage to the environment.
To dispose of a catalytic converter properly, it is recommended to take it to a recycling center or a licensed automotive repair facility. These facilities have the knowledge and resources to handle the proper disposal and recycling of the converter. They will ensure that the precious metals are extracted and reused, minimizing the environmental impact.
Follow Environmental Regulations
When removing a catalytic converter, it is crucial to follow all relevant environmental regulations. Different regions and countries have specific rules and guidelines regarding the handling and disposal of automotive parts, including catalytic converters. These regulations are in place to protect the environment and ensure the safe handling of hazardous materials.
Before removing a catalytic converter, it is essential to familiarize yourself with the local environmental regulations. This may include obtaining any necessary permits or certifications, as well as following specific procedures for handling and disposing of the converter. By adhering to these regulations, you can help minimize the impact on the environment and avoid any potential legal consequences.
Wear Protective Gloves
As mentioned earlier, wearing protective gloves is crucial when removing a catalytic converter. Protective gloves not only prevent direct skin contact but also provide additional safety benefits. They offer a better grip on tools, reducing the risk of accidents or injuries during the removal process.
When choosing protective gloves, opt for ones that are specifically designed for automotive work. These gloves are typically made of durable materials such as nitrile or latex, providing both comfort and protection. Make sure the gloves fit properly and allow for dexterity, as you will need to handle tools and components with precision.
Protect the Eyes from Falling Debris
During the removal of a catalytic converter, there is a possibility of falling debris or particles. This can occur when loosening bolts or nuts or when wiggling the converter to detach it from the exhaust system. To protect your eyes from potential harm, it is essential to wear safety glasses.
Safety glasses act as a shield, preventing any debris from entering your eyes and causing injury. They are designed to withstand impact and provide clear vision, ensuring your safety throughout the removal process. By wearing safety glasses, you can confidently carry out the task without worrying about any potential eye hazards.
In summary, when removing a catalytic converter, it is crucial to take safety precautions to protect yourself and the environment. Avoid direct skin contact with the converter by wearing protective gloves. Dispose of the catalytic converter properly by taking it to a recycling center or licensed automotive repair facility. Follow all environmental regulations to ensure compliance and minimize the impact on the environment. Remember to wear protective gloves and safety glasses to further enhance your safety during the removal process. By following these safety precautions, you can successfully remove the catalytic converter while keeping yourself and the environment safe.
Reinstalling the Exhaust System after Catalytic Converter Removal
Clean the Exhaust System Components
After successfully removing the catalytic converter, it is important to clean the various components of the exhaust system before reinstalling it. Over time, dirt, debris, and rust may accumulate, which can hinder the performance of the system. To ensure optimal functionality, take the time to thoroughly clean the pipes, muffler, and other parts.
To clean the exhaust system components, you will need a few simple tools and materials. Gather a wire brush, a mild detergent or degreaser, and a bucket of warm water. Begin by scrubbing the pipes and muffler with the wire brush to remove any loose dirt or rust. Then, mix the detergent or degreaser with the warm water in the bucket and use a sponge or cloth to wipe down the surfaces of the components. Rinse everything thoroughly with clean water and allow them to dry completely before proceeding with the reinstallation process.
Position the New Exhaust System in Place
Once the exhaust system components are clean and dry, it’s time to position the new system in place. This step requires careful attention to ensure proper alignment and fit. Start by placing the pipes and muffler in their respective positions, making sure they are oriented correctly according to the manufacturer’s instructions.
To hold the components in place temporarily, you can use adjustable clamps or zip ties. These will prevent any accidental movement or misalignment while you work on securing the system more permanently. Double-check that all the connections are properly aligned before moving on to the next step.
Tighten the Bolts or Nuts Securely
With the new exhaust system positioned correctly, it’s time to secure it firmly in place. This is done by tightening the bolts or nuts that connect the various components together. Use a socket set or wrench, depending on the type of fasteners used, to tighten each bolt or nut.
Start by loosely tightening the bolts or nuts, working your way around the system. Once all the fasteners are in place, go back and tighten them securely. Be careful not to overtighten, as this can damage the components or cause leaks. It’s important to find the right balance between tightness and flexibility to ensure a proper seal.
Lower the Vehicle from the Jack Stands
After successfully securing the new exhaust system, it’s time to lower the vehicle from the jack stands. This step is crucial for the safety of both the vehicle and the person working on it. Carefully remove the jack stands and lower the vehicle back to the ground.
To do this, use the jack to raise the vehicle slightly, allowing enough room to remove the jack stands. Then, slowly and steadily lower the vehicle until it is securely resting on all four wheels. Double-check that the vehicle is stable and not wobbling before proceeding.
Test the Vehicle for Proper Exhaust System Functionality
With the exhaust system reinstalled and the vehicle back on the ground, it’s time to test its functionality. Start the engine and listen for any unusual noises or vibrations. Pay attention to the exhaust system for any signs of leaks, such as hissing or puffing sounds.
While the engine is running, visually inspect the exhaust system for any visible signs of leaks or loose connections. If everything appears to be in order, take the vehicle for a short test drive to further evaluate its performance. Pay attention to any changes in engine power, fuel efficiency, or exhaust emissions.
If you notice any issues during the test, it’s important to address them promptly. Leaks or misalignments can lead to poor engine performance, increased emissions, and potential damage to other components. Consult a professional mechanic if necessary to ensure that the exhaust system is functioning optimally.
Remember, proper installation and maintenance of the exhaust system are essential for the overall performance and longevity of your vehicle. By following these steps and taking the time to reinstall it correctly, you can ensure a smooth and efficient exhaust system that complies with environmental regulations.
- Clean the exhaust system components
- Position the new exhaust system in place
- Tighten the bolts or nuts securely
- Lower the vehicle from the jack stands
- Test the vehicle for proper exhaust system functionality