
Discover the and of a steering wheel clock spring, how to diagnose a faulty one, the replacement process, and preventative maintenance tips for long-lasting performance.
What is a Steering Wheel Clock Spring?
The steering wheel clock spring is a crucial component of a vehicle’s steering system. It plays a vital role in ensuring the smooth and responsive operation of various features, such as the horn, cruise control, and airbag system.
Function and Purpose
The primary of a steering wheel clock spring is to maintain electrical connections between the steering wheel and the rest of the vehicle. It acts as a flexible conductor, allowing the steering wheel to turn freely while still providing a continuous flow of electrical signals.
The clock spring is responsible for transmitting electrical signals to activate essential functions, including the horn and cruise control. It also enables the communication between the driver’s airbag and the vehicle’s safety system.
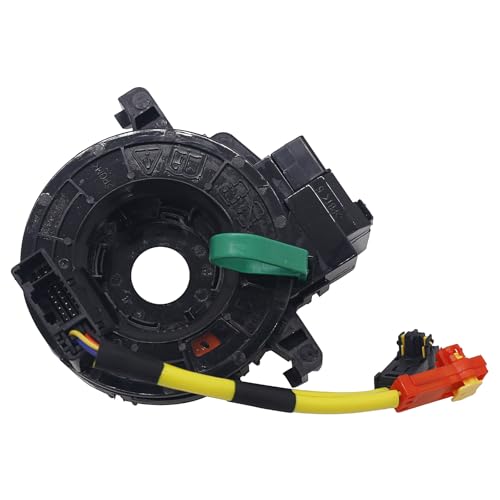
Components and Construction
The steering wheel clock spring consists of several components that work together to ensure its proper functioning. These components include:
- Housing: The clock spring is housed within a protective casing, usually made of durable materials like plastic or metal. This housing shields the delicate components from external elements, such as dust, moisture, and vibrations.
- Coiled Ribbon: At the core of the clock spring is a coiled ribbon made of conductive material, often copper or a copper alloy. The coiled ribbon acts as a conductor for electrical signals, allowing them to pass through while accommodating the rotational movement of the steering wheel.
- Connector Blocks: The clock spring is equipped with connector blocks that establish connections between the steering wheel and the vehicle’s wiring system. These blocks ensure a seamless flow of electrical signals between the steering wheel and other components.
- Slip Ring Contacts: The slip ring contacts are located at either end of the coiled ribbon. These contacts provide a continuous electrical connection, even as the steering wheel rotates. They allow for uninterrupted communication between the steering wheel controls and the vehicle’s electrical system.
The construction of a steering wheel clock spring involves precision engineering to ensure durability, flexibility, and optimal electrical conductivity. It is designed to withstand the rigors of everyday use and to provide consistent performance over an extended period.
Signs and Symptoms of a Faulty Clock Spring
Non-Functional Horn
Have you ever pressed the horn button on your steering wheel and nothing happened? This could be a sign of a faulty clock spring. The clock spring is responsible for transmitting electrical signals to various components in your vehicle, including the horn. When it malfunctions, the horn may not work at all, leaving you unable to alert other drivers in potentially dangerous situations.
Malfunctioning Cruise Control
Imagine cruising down the highway, trying to maintain a steady speed, when suddenly your cruise control stops working. This could be another indication of a faulty clock spring. The clock spring plays a vital role in sending signals to the cruise control system, allowing you to set and maintain your desired speed. If the clock spring fails, your cruise control may become non-responsive or function erratically, making your driving experience less comfortable and convenient.
Airbag Warning Light
One of the most important safety features in your vehicle is the airbag system. The clock spring is integral to the proper functioning of the airbag system, as it allows for the electrical connection between the steering wheel and the airbag module. If there is a problem with the clock spring, it can trigger the airbag warning light on your dashboard. This warning light is a clear sign that there is an issue with the clock spring and that your airbags may not deploy properly in the event of a collision.
To ensure the safety and functionality of your vehicle, it is important to pay attention to these of a faulty clock spring. If you experience any of these issues, it is recommended to have your vehicle inspected and repaired by a qualified mechanic. Ignoring these symptoms could lead to further damage and compromise your safety on the road.
Causes of Clock Spring Failure
When it comes to the clock spring in your vehicle’s steering wheel, there are several factors that can contribute to its failure. Understanding these causes can help you take preventative measures and address any issues promptly. Let’s take a closer look at the main reasons for clock spring failure:
Wear and Tear
One of the primary causes of clock spring failure is simply wear and tear over time. The clock spring is subjected to constant movement and strain as you turn the steering wheel, causing it to gradually deteriorate. As the clock spring wears out, it becomes more prone to failure and can eventually break or malfunction.

To minimize wear and tear on the clock spring, it’s important to handle the steering wheel with care and avoid excessive force when turning. Regular maintenance and inspections can also help identify any signs of wear early on, allowing for timely repairs or replacements.
Faulty Installation or Repair
Another common cause of clock spring failure is faulty installation or repair. If the clock spring is not properly installed during manufacturing or replaced incorrectly during repairs, it can lead to premature failure. Improper alignment, incorrect wiring, or inadequate securing of the clock spring can all contribute to its malfunction.
To ensure proper installation or repair of the clock spring, it’s essential to rely on skilled technicians who have experience working with steering wheel components. Following the manufacturer’s guidelines and using the correct tools and techniques is crucial for avoiding potential issues down the line.
Environmental Factors
Environmental factors can also play a role in clock spring failure. Extreme temperatures, moisture, and exposure to chemicals or contaminants can all impact the integrity of the clock spring. Over time, these environmental factors can cause the clock spring to become brittle, corroded, or damaged.
To protect the clock spring from environmental damage, it’s important to park your vehicle in a covered or sheltered area whenever possible. Additionally, regular cleaning and inspection of the steering wheel area can help identify and address any potential issues caused by environmental factors.
By understanding the causes of clock spring failure, you can take proactive steps to prevent or address any issues that may arise. Regular inspections, proper installation and repair techniques, and protecting the clock spring from environmental damage can all contribute to its longevity and reliable functionality.
How to Diagnose a Bad Clock Spring
Testing the Horn
One of the key signs of a faulty clock spring is a non-functional horn. If you press the horn button on your steering wheel and there is no sound or the sound is weak, it could indicate a problem with the clock spring. To test the horn, follow these steps:
- Start by turning off your engine and ensuring that the vehicle is in park.
- Locate the horn button on your steering wheel. It is usually located in the center or on the sides of the steering wheel.
- Press the horn button firmly and listen for any sound. If you hear a weak sound or no sound at all, it could be a sign of a bad clock spring.
- If the horn does not work, it is recommended to consult a professional mechanic to further diagnose and repair the clock spring.
Checking Cruise Control Functionality
A faulty clock spring can also affect the functionality of your cruise control system. If you notice that your cruise control is not engaging or maintaining the set speed properly, it could be a sign of a bad clock spring. To check the cruise control functionality, follow these steps:
- Start by ensuring that your vehicle is in a safe and open area, away from traffic.
- Turn on the engine and activate the cruise control system.
- Set the desired speed and observe if the cruise control system engages and maintains the set speed.
- If the cruise control does not engage or maintain the set speed, it could indicate a problem with the clock spring.
- It is advisable to have a professional mechanic inspect and repair the clock spring if necessary.
Scanning for Airbag Fault Codes
The clock spring is an integral part of the airbag system in your vehicle. If there is a fault in the clock spring, it can trigger the airbag warning light on your dashboard. To diagnose a bad clock spring using airbag fault codes, follow these steps:
- Start by turning off your engine and ensuring that the vehicle is in park.
- Locate the OBD-II port in your vehicle. It is usually located under the dashboard on the driver’s side.
- Connect an OBD-II scanner to the port and turn on the ignition without starting the engine.
- Follow the instructions on the scanner to scan for airbag fault codes.
- If the scanner detects any codes related to the clock spring or the airbag system, it indicates a problem with the clock spring.
- It is recommended to seek professional assistance to diagnose and repair the clock spring to ensure the proper functioning of the airbag system.
By following these steps, you can effectively a bad clock spring and take appropriate measures to address the issue. Remember, if you are unsure or uncomfortable performing these diagnostic procedures yourself, it is always best to consult a professional mechanic for assistance.
Clock Spring Replacement Process
The clock spring is an essential component of a vehicle’s steering system. Over time, it can wear out or become faulty, requiring replacement. In this section, we will guide you through the clock spring replacement process, including the tools and materials needed, removing the steering wheel, and installing and aligning the new clock spring.
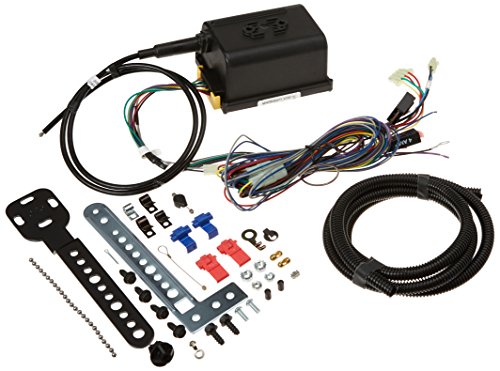
Tools and Materials Needed
Before you begin the clock spring replacement process, gather the following tools and materials:
- Socket set: You’ll need a socket set with various sizes to remove the steering wheel and other components.
- Screwdriver: A flathead or Phillips screwdriver may be necessary to remove screws or clips.
- Torx bit: Some vehicles require a Torx bit to loosen the screws holding the airbag module in place.
- Clock spring: Purchase a new clock spring that is compatible with your vehicle’s make and model.
- Safety equipment: Wear safety glasses and gloves to protect yourself during the replacement process.
Removing the Steering Wheel
To access the clock spring, you’ll need to remove the steering wheel. Here’s a step-by-step guide:
- Disconnect the battery: Before starting any work, disconnect the vehicle’s battery to prevent accidental airbag deployment.
- Locate the airbag module: The airbag module is typically located in the center of the steering wheel. Look for screws or clips securing it in place.
- Remove the airbag module: Carefully remove any screws or clips holding the airbag module and disconnect any electrical connectors. Set the airbag module aside in a safe place.
- Remove the steering wheel: Use a socket set to loosen and remove the center nut or bolt holding the steering wheel in place. Gently pull the steering wheel towards you to remove it from the steering column.
Installing and Aligning the New Clock Spring
Now that you’ve removed the steering wheel, it’s time to install and align the new clock spring. Follow these steps:
- Align the clock spring: Before installing the new clock spring, ensure that it is properly aligned. Align the marks on the clock spring with the corresponding marks on the steering column.
- Install the clock spring: Carefully position the new clock spring onto the steering column and secure it in place using the provided screws or clips.
- Reinstall the steering wheel: Line up the steering wheel with the steering column and gently push it back into place. Use a socket set to tighten the center nut or bolt.
- Reconnect the airbag module: Reconnect any electrical connectors and secure the airbag module back onto the steering wheel using the screws or clips.
- Reconnect the battery: Finally, reattach the vehicle’s battery and ensure that all components, including the horn and cruise control, are functioning properly.
By following these steps, you can successfully replace a faulty clock spring in your vehicle’s steering system. Remember to take your time and double-check all connections and alignments to ensure a safe and effective replacement process.
Preventative Maintenance for Clock Springs
Regular Inspection and Cleaning
Regular inspection and cleaning are crucial for maintaining the functionality and longevity of your clock spring. By periodically checking and cleaning your clock spring, you can identify any potential issues before they escalate into major problems. So, how exactly should you go about inspecting and cleaning your clock spring?
- Start by visually inspecting the clock spring for any signs of wear or damage. Look for frayed wires, loose connections, or any other visible issues. If you notice any abnormalities, it’s important to address them promptly.
- Next, you can use compressed air to remove any dust or debris that may have accumulated in the clock spring. Be sure to direct the airflow carefully, avoiding any excessive pressure that could potentially cause damage.
- Additionally, you can use a soft brush or cloth to gently clean the clock spring components. This will help remove any stubborn dirt or grime that the compressed air may not have been able to dislodge. Remember to be gentle during this process to avoid causing any damage.
Proper Installation Techniques
Proper installation techniques play a significant role in the overall performance and reliability of your clock spring. When installing a new clock spring or replacing a faulty one, it’s essential to follow the manufacturer’s instructions and guidelines. Here are a few key points to keep in mind:
- Ensure that you have the necessary tools and materials for the installation process. This may include a torque wrench, socket set, and any specific components required by the manufacturer.
- Before installation, carefully inspect the new clock spring to ensure it is free from any defects or damage. This step is crucial to prevent future issues and ensure optimal functionality.
- Follow the step-by-step instructions provided by the manufacturer, paying close attention to torque specifications and alignment requirements. Proper alignment is particularly important to avoid any potential steering issues.
- Take your time during the installation process and double-check your work. Rushing through the installation or overlooking important details can lead to mistakes that may compromise the performance of the clock spring.
Protecting Against Environmental Damage
Clock springs can be susceptible to environmental factors that can cause premature wear and damage. To protect your clock spring from environmental damage, consider the following measures:
- Shield your clock spring from excessive moisture and humidity, as these can corrode the internal components over time. If you live in a particularly humid area or frequently encounter wet conditions, consider using a protective cover or sealant to create a barrier.
- Protect your clock spring from extreme temperature fluctuations. Exposure to extreme heat or cold can affect the integrity of the materials used in the clock spring, leading to potential failures. If your vehicle is regularly exposed to extreme temperatures, consider parking in a covered area or using a sunshade to minimize exposure.
- Be mindful of the presence of chemicals or contaminants that may come into contact with your clock spring. Certain chemicals, such as oil or solvents, can degrade the materials and compromise the functioning of the clock spring. Take precautions to avoid any potential spills or leaks that could damage the clock spring.
By following these preventative maintenance practices, you can maximize the lifespan of your clock spring and ensure reliable performance. Remember, regular inspection, proper installation, and protection against environmental damage are key to keeping your clock spring in top shape.