
Discover effective methods to fix a damaged catalytic converter without replacing it. From cleaning and patching to using additives, we provide a complete guide to save money and restore your vehicle’s performance.
Signs of a Damaged Catalytic Converter
A damaged catalytic converter can lead to various issues with your vehicle’s performance and emissions. By recognizing the signs of a damaged catalytic converter, you can take the necessary steps to address the problem promptly. In this section, we will discuss three primary indicators of a damaged catalytic converter: decreased engine performance, rattling noise from underneath the vehicle, and a sulfur smell from the exhaust.
Decreased Engine Performance
One of the most noticeable signs of a damaged catalytic converter is a decrease in engine performance. You may experience a loss of power, reduced acceleration, or difficulty maintaining speed. This can be attributed to a restriction in the exhaust flow caused by a damaged catalytic converter. As a result, the engine has to work harder to push out the exhaust gases, leading to a decrease in overall performance.
To determine if your catalytic converter is the cause of the decreased engine performance, you can perform a simple test. Start by checking if there are any clogs or blockages in the exhaust system, including the catalytic converter. Inspect the converter for physical damage or signs of overheating, such as discoloration or melting. If you notice any abnormalities, it is likely that your catalytic converter is damaged and needs attention.
Rattling Noise from Underneath the Vehicle
Another telltale sign of a damaged catalytic converter is a rattling noise coming from underneath the vehicle. This noise is often more pronounced during acceleration or when the engine is under load. It occurs when the internal components of the catalytic converter become loose or detached, creating a metallic rattling sound as exhaust gases pass through.
The rattling noise is a clear indication that the catalytic converter is no longer functioning properly and needs to be addressed. Ignoring this issue can lead to further damage, as loose components can cause blockages or even break apart inside the converter. If you hear a rattling noise, it is crucial to have your catalytic converter inspected and repaired or replaced if necessary.

Sulfur Smell from Exhaust
A distinct sulfur smell coming from your vehicle’s exhaust is another sign that your catalytic converter may be damaged. The catalytic converter plays a vital role in reducing harmful emissions by converting toxic gases into less harmful substances. However, when the converter is damaged, it may fail to effectively convert hydrogen sulfide gas into sulfur dioxide, resulting in the release of the foul-smelling sulfur compound.
If you notice a strong sulfur smell coming from your exhaust, it is essential to address the issue promptly. A damaged catalytic converter can not only affect your vehicle’s performance but also contribute to increased pollution. By identifying and repairing the problem, you can ensure that your vehicle operates efficiently and meets emission standards.
In summary, recognizing the signs of a damaged catalytic converter is crucial in maintaining your vehicle’s performance and emissions. Decreased engine performance, a rattling noise from underneath the vehicle, and a sulfur smell from the exhaust are all indicators that your catalytic converter may be damaged. If you experience any of these signs, it is recommended to have your catalytic converter inspected and repaired by a qualified professional. By addressing the issue promptly, you can ensure the longevity of your vehicle’s exhaust system and minimize the impact on both your driving experience and the environment.
Precautions Before Attempting a Repair
When it comes to repairing a damaged catalytic converter, taking the necessary precautions is crucial to ensure your safety and the effectiveness of the repair. Before diving into the repair process, there are a few important things to keep in mind.
Safety Gear and Equipment
To begin with, it is essential to have the right safety gear and equipment on hand. This includes wearing protective goggles, gloves, and a face mask to shield yourself from any potential harmful substances. Remember, working on a catalytic converter involves dealing with exhaust fumes and potentially toxic chemicals, so protecting yourself is of utmost importance.
Vehicle Cool Down Period
Before attempting any repair work, make sure to allow your vehicle to cool down completely. The catalytic converter can reach extremely high temperatures while the engine is running, and working on it while it is still hot can lead to burns or other injuries. Give it enough time to cool down to a safe temperature before proceeding with the repair.

Disconnecting the Battery
Another precautionary step is to disconnect the battery of your vehicle. This step ensures that there is no power running through the electrical system, reducing the risk of accidental electrical shocks during the repair process. To disconnect the battery, locate the negative terminal (usually marked with a “-” symbol), and use a wrench or socket to loosen the nut. Once loosened, carefully lift the negative cable off the terminal and secure it away from the battery.
Now that we have discussed the necessary precautions before attempting a repair on your catalytic converter, you can proceed with confidence, knowing that you are taking the appropriate steps to ensure safety. Remember, safety should always be the top priority when working on any automotive repair.
Here is a summary of the precautions to take before attempting a catalytic converter repair:
- Ensure you have the right safety gear and equipment, including goggles, gloves, and a face mask.
- Allow your vehicle to cool down completely before starting any repair work.
- Disconnect the battery to eliminate the risk of electrical shocks.
By following these precautions, you can proceed with the repair process knowing that you have taken the necessary steps to protect yourself and ensure a successful repair.
Cleaning the Catalytic Converter
When it comes to maintaining the performance of your vehicle’s catalytic converter, regular cleaning is essential. Over time, the converter can become clogged with carbon deposits and other contaminants, leading to decreased efficiency and potential damage. In this section, we will explore different methods and techniques for cleaning your catalytic converter, ensuring its optimal functionality and longevity.
Using a Catalytic Converter Cleaner
One effective way to clean your catalytic converter is by using a catalytic converter cleaner. These specially formulated cleaners are designed to break down and remove carbon deposits, soot, and other contaminants that accumulate over time. They work by chemically reacting with the buildup, breaking it down into smaller, less harmful particles that can be expelled through the exhaust system.
To use a catalytic converter cleaner, simply follow these steps:
- Step 1: Park your vehicle in a well-ventilated area. Make sure the engine is turned off and the exhaust system has cooled down completely.
- Step 2: Locate the catalytic converter. In most vehicles, it is positioned underneath the vehicle, between the engine and the muffler. Refer to your vehicle’s manual if you’re unsure about its location.
- Step 3: Shake the catalytic converter cleaner bottle well to ensure proper mixing of the ingredients.
- Step 4: Attach the provided application hose to the cleaner bottle. The length of the hose will vary depending on the brand, but it should be long enough to reach the catalytic converter.
- Step 5: Insert the application hose into the catalytic converter’s inlet, which is the pipe that connects the converter to the exhaust manifold. Ensure a tight and secure fit to prevent any leaks.
- Step 6: Squeeze the bottle gently to release the cleaner into the catalytic converter. Follow the manufacturer’s instructions regarding the appropriate amount to use.
- Step 7: Allow the catalytic converter cleaner to sit for the recommended duration. This can vary depending on the brand, but it typically ranges from 15 minutes to an hour.
- Step 8: After the specified time has passed, start the engine and let it run for a few minutes. This will help circulate the cleaner throughout the converter and aid in the cleaning process.
- Step 9: Finally, take your vehicle for a short drive, preferably on a highway or open road. This will allow the increased exhaust flow and higher temperatures to further aid in the cleaning process.
By using a catalytic converter cleaner regularly, you can help prevent carbon buildup and prolong the life of your converter, ensuring optimal engine performance and reducing the risk of expensive repairs or replacements.
Removing and Soaking the Converter
Another method of cleaning the catalytic converter is by removing it from the vehicle and soaking it in a cleaning solution. This method is more time-consuming and requires a bit more effort, but it can be effective in removing stubborn deposits and restoring the converter’s efficiency.
Before attempting this method, it’s important to note that removing the catalytic converter requires mechanical knowledge and tools. If you’re not confident in your abilities, it’s best to seek professional help or consult a knowledgeable mechanic.
If you decide to proceed with removing and soaking the catalytic converter, here are the steps to follow:
- Step 1: Ensure the vehicle is parked on a flat and stable surface. Apply the parking brake and chock the wheels for added safety.
- Step 2: Allow the engine and exhaust system to cool down completely. This will prevent any accidental burns or injuries.
- Step 3: Locate the catalytic converter, which is typically positioned underneath the vehicle, between the engine and the muffler. Refer to your vehicle’s manual for specific instructions.
- Step 4: Using appropriate tools, carefully disconnect the catalytic converter from the exhaust system. This may involve removing bolts, clamps, or brackets that hold it in place. Take note of the position of these components for reinstallation later.
- Step 5: Once the catalytic converter is removed, prepare a cleaning solution. There are commercial cleaning solutions available, or you can create your own solution using a mixture of warm water and a mild detergent.
- Step 6: Submerge the catalytic converter in the cleaning solution, ensuring it is fully covered. Allow it to soak for the recommended time, which can vary depending on the severity of the buildup.
- Step 7: While the catalytic converter is soaking, use a soft brush or sponge to gently scrub the exterior and interior surfaces. This will help dislodge any remaining deposits and enhance the cleaning process.
- Step 8: After the recommended soaking time has passed, remove the catalytic converter from the cleaning solution. Rinse it thoroughly with clean water to remove any residue or detergent.
- Step 9: Inspect the catalytic converter for any signs of damage or deterioration. If you notice any cracks, holes, or other issues, it may be necessary to replace the converter instead of reinstalling it.
- Step 10: Once the catalytic converter is clean and dry, carefully reinstall it into the exhaust system. Ensure all bolts, clamps, and brackets are tightened properly to prevent any leaks or vibrations.
Cleaning your catalytic converter through soaking can be a time-consuming process, but it can help restore its efficiency and prolong its lifespan. However, if you’re unsure about performing this task yourself, it’s always best to consult a professional mechanic who can provide expert guidance and assistance.
Repairing Catalytic Converter P0420 Error Code
The P0420 error code is a common issue that many car owners face when it comes to their catalytic converter. This error code indicates that the catalytic converter is not functioning properly and may need to be repaired or replaced. In this section, we will discuss the steps you can take to repair the catalytic converter and resolve the P0420 error code.
Resetting the Error Code
Before diving into any repairs, it’s always a good idea to start by resetting the error code. This can be done using an OBD-II scanner or by disconnecting the car’s battery for a few minutes. Resetting the error code will clear any stored codes in the car’s computer system and give you a fresh start.
To reset the error code using an OBD-II scanner, simply plug the scanner into the car’s diagnostic port, which is usually located under the dashboard on the driver’s side. Follow the instructions provided by the scanner to clear the codes. If you don’t have access to a scanner, you can also disconnect the car’s battery. Start by removing the negative terminal cable and then the positive terminal cable. Leave the battery disconnected for about 10-15 minutes before reconnecting it. This should reset the error code.
Checking for Exhaust Leaks
A common cause of the P0420 error code is an exhaust leak. Before replacing the catalytic converter, it’s important to check for any leaks in the exhaust system. Exhaust leaks can occur at the manifold, the pipes, or even at the connections between different components. A leak can allow oxygen to enter the exhaust system, which can cause the catalytic converter to malfunction.
To check for exhaust leaks, start by visually inspecting the exhaust system for any obvious signs of damage or holes. Look for rust, cracks, or loose connections. Next, you can use a smoke machine to help identify any hidden leaks. The smoke machine will emit a visible smoke that can be seen escaping from any leaks in the system. If you don’t have access to a smoke machine, you can also use a soapy water solution. Simply spray the solution onto the connections and look for any bubbles, which would indicate a leak.
Replacing Oxygen Sensors
Another possible cause of the P0420 error code is a faulty oxygen sensor. The oxygen sensors play a crucial role in the functioning of the catalytic converter. They measure the oxygen content in the exhaust gases and send this information to the car’s computer system. If the oxygen sensors are not functioning properly, it can lead to an incorrect reading from the catalytic converter, triggering the P0420 error code.
To replace the oxygen sensors, start by locating them. Most cars have at least two oxygen sensors, one before and one after the catalytic converter. They are typically screwed into the exhaust system, either on the manifold or on the pipes. Once you have located the sensors, use a wrench or socket set to remove them. Be careful not to damage the sensor or the threads while removing them. Install the new sensors by screwing them in and tightening them securely. Make sure to connect any electrical connectors that may be present.
Replacing the oxygen sensors can be a relatively simple task, but it’s important to use the correct sensors for your specific car make and model. Consult your car’s manual or speak to a knowledgeable mechanic to ensure you purchase the right sensors.
Remember, if you’re not comfortable with performing these repairs yourself, it’s always best to consult with a mechanic who can provide professional assistance. They have the knowledge and experience to accurately diagnose and repair any issues with your catalytic converter.
Patching a Damaged Catalytic Converter
Has your catalytic converter been damaged? Don’t worry, there are ways to patch it up and get it working again. In this section, we will guide you through the process of identifying the location of the damage, applying a catalytic converter patch, and securing it with clamps or welding. Let’s get started!
Identifying the Location of the Damage
The first step in patching a damaged catalytic converter is to identify where the damage is located. This can be done by visually inspecting the converter and looking for any signs of holes, cracks, or other forms of damage. It’s important to note that the converter is usually located underneath the vehicle, so you may need to use a jack or lift to get a clear view.
Once you have identified the damaged area, it’s essential to determine the extent of the damage. Is it a small hole that can be easily patched, or is it a more significant issue that may require a replacement? If the damage is extensive, it might be best to seek professional help. However, if it’s a minor issue, you can proceed with patching it yourself.
Applying a Catalytic Converter Patch
Now that you have identified the location and extent of the damage, it’s time to apply a catalytic converter patch. There are various patching materials available in the market, such as epoxy-based compounds or heat-resistant tapes. Choose a patching material that is specifically designed for use with catalytic converters.
Before applying the patch, make sure to clean the damaged area thoroughly. Remove any dirt, rust, or debris that may interfere with the patching process. Once the area is clean and dry, follow the instructions provided with the patching material to apply it correctly. Ensure that the patch covers the entire damaged area and is firmly secured.
Securing the Patch with Clamps or Welding
To ensure the longevity of the patch and prevent any further damage, it’s crucial to secure it properly. Depending on the patching material you have used, you can either use clamps or opt for welding.
If you have chosen a patching material that requires clamping, carefully position the clamps over the patch and the surrounding area. Tighten the clamps securely, ensuring that the patch is held firmly in place. This will prevent any movement or detachment of the patch during vehicle operation.
Alternatively, if you have the necessary skills and equipment, you can opt for welding to secure the patch. Welding provides a more permanent and robust solution. However, it requires expertise and precision to avoid damaging the converter further. If you are not confident in your welding abilities, it’s best to consult a professional.
Remember, patching a damaged catalytic converter is a temporary solution and should only be done if the damage is minor. It’s always recommended to seek professional help for extensive damage or if the converter is beyond repair. Additionally, make sure to comply with local laws and regulations regarding emissions control when dealing with catalytic converter repairs.
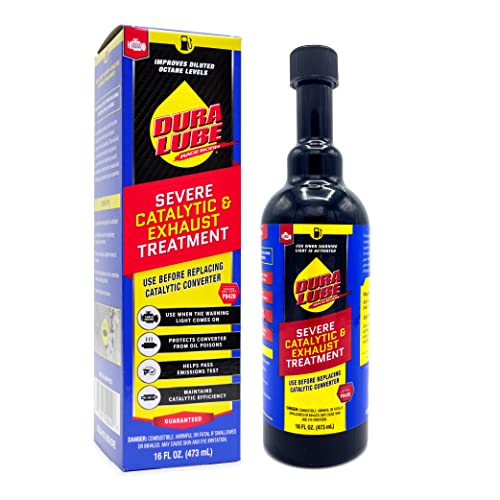
Using Catalytic Converter Cleaner Additives
Are you experiencing a decrease in your vehicle’s engine performance? Or maybe you’ve noticed a strange sulfur smell coming from your exhaust? These could be signs of a damaged catalytic converter. Before you jump into costly repairs or replacements, there is a solution that might help – using catalytic converter cleaner additives. In this section, we will guide you through the process of using these additives to potentially restore the efficiency of your catalytic converter.
Choosing the Right Cleaner Additive
When it comes to choosing the right cleaner additive for your catalytic converter, it’s important to consider a few factors. First and foremost, make sure the cleaner you select is specifically designed for catalytic converters. These cleaners are formulated to break down carbon deposits and other contaminants that may be clogging your converter.
Next, take into account the type of fuel your vehicle uses. Some cleaner additives are designed for gasoline engines, while others are formulated for diesel engines. Make sure to choose a cleaner that matches the fuel type of your vehicle for optimal results.
Lastly, consider the brand and reputation of the cleaner additive. Look for products that have positive reviews and are trusted by professionals in the automotive industry. This will give you the confidence that you are using a reliable and effective cleaner.
Adding the Cleaner to the Fuel Tank
Adding the cleaner additive to your fuel tank is a relatively simple process. Here’s a step-by-step guide to help you through it:
- Start by ensuring that your vehicle has a sufficient amount of fuel in the tank. It is recommended to have at least a quarter tank of fuel before adding the cleaner.
- Carefully read the instructions provided with the cleaner additive. The manufacturer will provide specific guidelines on the amount of cleaner to use based on the size of your fuel tank.
- Once you have determined the correct amount of cleaner, remove the cap from the fuel tank.
- Slowly pour the cleaner additive into the fuel tank, taking care not to spill any on the exterior of the vehicle or yourself.
- Replace the fuel tank cap securely.
Driving to Allow the Cleaner to Work
After adding the cleaner additive to your fuel tank, it’s important to drive your vehicle to allow the cleaner to work its magic. The movement of the vehicle helps distribute the cleaner throughout the fuel system, including the catalytic converter.
During this driving period, it is recommended to take your vehicle for a longer drive, preferably on a highway or open road. This will allow the engine to reach optimal operating temperature, which helps facilitate the cleaning process.
While driving, pay attention to any changes in your vehicle’s performance. You may notice improvements in engine performance, reduced emissions, and even a decrease in the sulfur smell from the exhaust. However, keep in mind that the effectiveness of the cleaner additive may vary depending on the extent of the damage to your catalytic converter.
It’s important to note that using catalytic converter cleaner additives is not a guaranteed fix for all catalytic converter issues. In some cases, more extensive repairs or even a replacement may be necessary. If you are unsure about the extent of the damage or if the cleaner additive does not yield satisfactory results, it is always best to consult with a professional mechanic.
Installing a Catalytic Converter Heat Shield
Catalytic converters are an essential part of a vehicle’s exhaust system, but they can generate a significant amount of heat during operation. This heat can potentially damage surrounding components, such as wiring, hoses, and nearby body panels. To protect these vulnerable parts, installing a catalytic converter heat shield is a wise precautionary measure. In this section, we will discuss the step-by-step process of installing a heat shield for your catalytic converter.
Removing the Old Heat Shield
Before you can install a new heat shield, you must first remove the old one. This may require some basic tools, such as a wrench or socket set. Follow these steps to remove the old heat shield:
- Park the vehicle on a flat and stable surface. Ensure that the parking brake is engaged and the engine is turned off.
- Allow the exhaust system to cool down. It’s crucial to avoid any contact with hot components to prevent burns or injuries.
- Locate the old heat shield. It is typically positioned around the catalytic converter, either bolted or clamped in place.
- Loosen and remove any fasteners. Use the appropriate tools to loosen and remove any bolts or clamps securing the old heat shield.
- Gently slide the old heat shield off. Be cautious not to damage any surrounding components while removing the heat shield.
Choosing the Appropriate Heat Shield
When selecting a new heat shield for your catalytic converter, it is essential to choose one that is compatible with your vehicle’s make and model. Consider the following factors when making your decision:
- Material: Heat shields are commonly made from stainless steel, aluminum, or a combination of both. Stainless steel offers greater durability, while aluminum provides excellent heat dissipation.
- Fitment: Ensure that the heat shield is designed specifically for your vehicle’s catalytic converter. It should align perfectly with the converter and have the necessary mounting points.
- Insulation: Look for heat shields that provide effective insulation to minimize heat transfer to surrounding components.
- Ease of installation: Opt for a heat shield that comes with clear installation instructions and all the necessary hardware for a hassle-free installation process.
Installing the New Heat Shield Properly
Once you have chosen the appropriate heat shield for your catalytic converter, you can proceed with the installation. Follow these steps to ensure a proper and secure installation:
- Prepare the new heat shield. Before installation, inspect the heat shield for any defects or damage. Ensure that all mounting holes align with the catalytic converter and any necessary brackets or clamps.
- Position the new heat shield. Carefully slide the new heat shield over the catalytic converter, ensuring that it covers the entire surface area of the converter.
- Secure the heat shield. Depending on the design of the heat shield, you may need to use bolts, clamps, or brackets to secure it in place. Follow the manufacturer’s instructions for the specific installation method.
- Tighten all fasteners. Use the appropriate tools to tighten all bolts, clamps, or brackets, ensuring a secure and stable fit.
- Double-check the installation. Once the heat shield is installed, visually inspect it to ensure that it is properly aligned and there are no gaps or loose connections.
By installing a catalytic converter heat shield, you provide an extra layer of protection to your vehicle’s surrounding components. This simple and effective measure can prevent potential heat-related damage and ensure the longevity of your vehicle’s exhaust system.
Remember, if you encounter any difficulties during the installation process or if you are unsure about any step, it is always recommended to seek professional assistance. A mechanic or automotive technician can guide you through the process or perform the installation for you, ensuring that it is done correctly and safely.
In the next section, we will discuss the importance of seeking professional help when dealing with catalytic converter issues.
Seeking Professional Help
When it comes to dealing with catalytic converter issues, seeking professional help is often the best course of action. While there are some repairs that you can attempt on your own, it’s important to know when it’s time to consult with a mechanic. Here are a few situations where seeking professional help is necessary:
Consulting with a Mechanic
If you’re experiencing any problems with your catalytic converter and you’re unsure about what steps to take, it’s always a good idea to consult with a mechanic. These professionals have the knowledge and experience to diagnose the issue accurately and provide you with the best solutions. They can assess the condition of your catalytic converter and determine whether it needs cleaning, repair, or replacement.
During a consultation with a mechanic, they will likely ask you about the symptoms you’ve noticed. This could include decreased engine performance, strange noises coming from under the vehicle, or a sulfur smell from the exhaust. By providing them with this information, they can better understand the issue and start working towards a resolution.
Getting a Catalytic Converter Test
In some cases, a mechanic may recommend getting a catalytic converter test done. This test involves using specialized equipment to measure the efficiency of your catalytic converter and determine if it’s functioning properly. By analyzing the data from the test, the mechanic can identify any potential issues and recommend the best course of action.
During the test, the mechanic will connect the equipment to your vehicle’s onboard diagnostics system. This will allow them to gather information about the performance of the catalytic converter and detect any error codes that may be present. By conducting this test, they can accurately assess the condition of the catalytic converter and determine if it needs repair or replacement.
Exploring Warranty or Insurance Coverage
If your vehicle is still under warranty or you have insurance coverage that includes catalytic converter repairs, it’s important to explore these options before proceeding with any repairs. Depending on the terms of your warranty or insurance policy, you may be able to have the repairs covered or receive reimbursement for the costs.
To explore warranty coverage, you should contact your vehicle manufacturer or dealership. Provide them with the necessary information about your vehicle and the issues you’re experiencing with the catalytic converter. They will be able to guide you through the warranty process and let you know if the repairs are covered.
If you have insurance coverage that includes catalytic converter repairs, reach out to your insurance provider. They will be able to provide you with information on the coverage available and any specific steps you need to take to file a claim.
In conclusion, when it comes to dealing with catalytic converter problems, seeking professional help is often the best choice. Consulting with a mechanic can provide you with expert advice and guidance on how to address the issue. Getting a catalytic converter test can help accurately diagnose the problem and determine the appropriate repairs. Additionally, exploring warranty or insurance coverage can potentially save you money on the repairs. Remember, it’s important to act promptly when you notice any signs of a damaged catalytic converter to prevent further damage to your vehicle’s performance and the environment.