
Discover how to fix a sagging headliner in your car with our easy-to-follow DIY guide. Learn the signs, causes, and steps for repairing and preventing headliner sagging.
Signs of a Sagging Headliner
Is your headliner starting to droop or sag in your vehicle? Noticing any strange rattling or flapping noises while driving? These are common signs that your headliner may be in need of repair. But what exactly causes these issues and how can you fix them? Let’s take a closer look.
Visible Drooping or Sagging
One of the most obvious signs of a sagging headliner is visible drooping. You might notice that the fabric or material on the ceiling of your vehicle is no longer taut and has started to hang down. This can be a real eyesore and can also obstruct your view while driving. If you’re tired of looking at a sagging headliner every time you get in your car, it’s time to take action.
Rattling or Flapping Noise While Driving
Another telltale sign of a sagging headliner is the presence of rattling or flapping noises while driving. As the headliner starts to detach from the roof of your vehicle, it can create a gap where air can pass through. This can result in annoying noises that can be quite distracting. If you’re hearing strange sounds coming from above, it’s likely that your headliner is in need of repair.
Now that we’ve identified the signs of a sagging headliner, it’s important to understand what causes this issue and how you can prepare for the repair process.
Causes of a Sagging Headliner
Age and wear of the adhesive
As your vehicle ages, the adhesive that holds the headliner in place can deteriorate over time. This can be due to exposure to heat, moisture, and other environmental factors. The adhesive may become less effective, causing the headliner to sag or droop.

Extreme heat or moisture exposure
Extreme temperatures, especially excessive heat or humidity, can contribute to the sagging of a headliner. Heat can cause the adhesive to weaken and lose its grip, leading to the headliner detaching from the roof of the vehicle. Similarly, moisture can seep into the headliner and weaken the adhesive, resulting in sagging.
To better understand these causes, let’s dive deeper into each one:
Age and wear of the adhesive
Over time, the adhesive used to attach the headliner to the vehicle’s roof can start to break down. This is especially true if the adhesive is exposed to constant sunlight or extreme temperature fluctuations. As the adhesive ages, it becomes less effective in holding the headliner in place, resulting in sagging or drooping.
Extreme heat or moisture exposure
When a vehicle is exposed to excessive heat, such as parking it under direct sunlight for extended periods, the heat can affect the adhesive’s integrity. The heat causes the adhesive to soften and weaken, leading to the headliner sagging. Similarly, excessive moisture, such as from rain or leaks, can seep into the headliner and damage the adhesive, causing it to lose its grip and resulting in sagging.
It’s important to note that these causes can often occur simultaneously. For example, a vehicle parked in a humid environment for extended periods may experience both extreme heat and moisture exposure, which can accelerate the deterioration of the adhesive and lead to a sagging headliner.
Understanding the causes of a sagging headliner is essential in addressing the issue effectively. In the following sections, we will explore how to prepare for headliner repair and the steps to fix a sagging headliner.

Preparing for Headliner Repair
Before you begin repairing a sagging headliner, it’s important to gather the necessary tools and materials. Additionally, you’ll want to remove any accessories or fixtures that are attached to the headliner. This will ensure that you have everything you need and can work efficiently without any obstructions.
Gather necessary tools and materials
To successfully repair a sagging headliner, you will need the following tools and materials:
- Screwdriver or trim removal tool: This will help you remove any screws or fasteners that are holding the headliner in place.
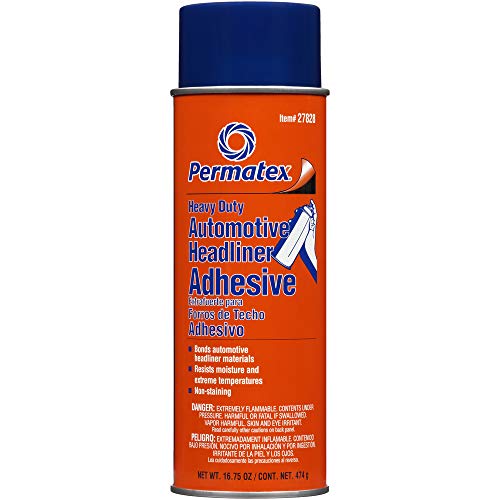
- Adhesive: Choose an adhesive that is specifically designed for headliners. Make sure to read the instructions and select an adhesive that is suitable for your type of headliner fabric.
- Scissors or utility knife: You may need to trim excess fabric or make precise cuts during the repair process.
- Vacuum cleaner: Use a vacuum cleaner with a brush attachment to remove dust and debris from the headliner and the surrounding area.
- Mild detergent solution: Prepare a solution of mild detergent and water to clean any stains on the headliner fabric.
- Clean cloth or sponge: Use a clean cloth or sponge to apply the detergent solution and gently clean the headliner.
Remove any accessories or fixtures attached to headliner
Before you can begin repairing the sagging headliner, it’s important to remove any accessories or fixtures that are attached to it. This includes items such as handles, lights, and visors. By removing these items, you’ll have better access to the headliner and be able to work more effectively.
To remove accessories or fixtures from the headliner, follow these steps:
- Identify the screws or fasteners that are holding the accessories or fixtures in place. These are usually located on the underside of the headliner or on the accessories themselves.
- Use a screwdriver or trim removal tool to carefully remove the screws or fasteners. Make sure to keep track of these screws or fasteners so that you can reattach the accessories later.
- Gently detach the accessories or fixtures from the headliner. Take care not to damage the headliner or the accessories during this process.
Once you have removed all the accessories or fixtures, you’re ready to move on to the next step in repairing the sagging headliner.
Removing the Sagging Headliner
Locate and Remove Screws or Fasteners
When it comes to removing a sagging headliner, the first step is to locate and remove any screws or fasteners that are holding it in place. These screws or fasteners are usually found along the edges of the headliner, near the roof of the vehicle. You may need to use a screwdriver or a wrench to loosen and remove them.
Gently Peel off the Headliner Fabric
Once the screws or fasteners have been removed, you can begin to gently peel off the headliner fabric. It’s important to be careful during this process to avoid tearing or damaging the fabric. Start from one corner and slowly work your way across, using your hands to peel the fabric away from the roof.
It’s normal to encounter some resistance as the fabric may be stuck to the adhesive underneath. Take your time and be patient, ensuring that you don’t rush and cause any unnecessary damage. If you come across any particularly stubborn areas, you can use a plastic spatula or a putty knife to carefully pry the fabric away from the adhesive.
Remember, the goal here is to remove the sagging headliner without causing any further damage. By locating and removing the screws or fasteners and gently peeling off the fabric, you’re on your way to successfully removing the sagging headliner from your vehicle.
Cleaning and Prepping the Headliner
When it comes to repairing a sagging headliner, cleaning and prepping the headliner is an important step to ensure a successful repair. This process involves removing any dust, debris, and stains from the headliner fabric. By following these steps, you can effectively clean and prep your headliner for repair.
Vacuuming off Dust and Debris
The first step in cleaning the headliner is to remove any dust and debris that may have accumulated over time. Using a vacuum cleaner with a brush attachment, gently run the brush over the surface of the headliner fabric. This will help remove any loose dirt or particles that may be causing the headliner to sag.
Applying a Mild Detergent Solution for Stains
If your headliner has stains that need to be removed, using a mild detergent solution can help. Start by mixing a small amount of mild detergent with warm water. Dip a clean cloth or sponge into the solution and gently dab it onto the stained area of the headliner. Avoid rubbing the fabric vigorously, as this can cause further damage.
After applying the detergent solution, use a clean cloth or sponge dampened with plain water to rinse the area. Blot the dampened area with a dry cloth to remove excess moisture. It’s important to note that you should always test the detergent solution on a small, inconspicuous area of the headliner first to ensure it doesn’t cause any discoloration or damage.
By vacuuming off dust and debris and applying a mild detergent solution for stains, you can effectively clean and prep your headliner for repair. These steps will help ensure that the adhesive used to reattach the headliner will adhere properly and provide long-lasting results.
Remember, taking the time to properly clean and prep your headliner can make a significant difference in the overall quality of your repair. So, don’t skip this important step and enjoy a headliner that looks as good as new!
Applying Adhesive to the Headliner
When it comes to repairing a sagging headliner, one of the most crucial steps is applying adhesive to the headliner. This ensures that the fabric adheres properly to the roof of your vehicle, preventing it from sagging again in the future. In this section, we will discuss how to choose the right adhesive type and how to apply it evenly to achieve the best results.
Choosing the Right Adhesive Type
Selecting the appropriate adhesive for your headliner repair is essential for a successful outcome. There are various types of adhesives available on the market, each with its own unique properties. Here are a few factors to consider when choosing the right adhesive type:
- Compatibility: Ensure that the adhesive you choose is compatible with both the headliner fabric and the roof material. Some adhesives may work better with certain types of fabrics or surfaces, so it’s important to read the product labels and specifications carefully.
- Strength: Look for adhesive products that offer strong bonding capabilities. This will ensure that the headliner fabric stays securely in place even during vehicle movement or temperature changes.
- Drying Time: Consider the drying time of the adhesive. Faster drying adhesives may allow you to complete the repair more quickly, but be mindful of the working time to ensure you have enough time to apply the adhesive evenly.
- Ease of Application: Opt for adhesives that are easy to apply and work with. Some adhesives come in spray form, while others may require a brush or roller for application. Choose one that suits your comfort level and experience.
Remember to follow the manufacturer’s instructions and recommendations when selecting the adhesive type for your headliner repair. This will help you achieve the best possible results.
Applying Adhesive Evenly on Headliner and Roof
Once you have selected the appropriate adhesive, it’s time to apply it to both the headliner fabric and the roof of your vehicle. Follow these steps to ensure a smooth and even application:
- Prepare the Surface: Before applying the adhesive, make sure the headliner fabric and roof surface are clean and free from any dust or debris. Use a vacuum cleaner to remove any loose particles that could interfere with the adhesive bonding.
- Test on a Small Area: It’s always a good idea to test the adhesive on a small, inconspicuous area of the headliner fabric before applying it to the entire surface. This will allow you to check for any adverse reactions or discoloration.
- Apply Adhesive to Headliner: Start by applying a thin, even layer of adhesive to the backside of the headliner fabric. Use a brush or roller to spread the adhesive evenly, ensuring that it covers the entire surface. Avoid applying too much adhesive, as it can lead to excess bulk and uneven bonding.
- Apply Adhesive to Roof: Once the adhesive is applied to the headliner fabric, carefully position the fabric onto the roof surface. Press it firmly into place, making sure it adheres evenly across the entire area. Smooth out any wrinkles or bubbles using a clean cloth or roller.
- Allow Drying Time: Give the adhesive sufficient time to dry according to the manufacturer’s instructions. Avoid touching or manipulating the headliner fabric during this time to prevent any disruption in the bonding process.
By following these steps and applying the adhesive correctly, you can ensure a strong and long-lasting bond between the headliner fabric and the roof of your vehicle. This will help prevent future sagging and keep your headliner looking great for years to come.
Reattaching the Headliner
So, you’ve successfully removed the sagging headliner from your car. Now it’s time to reattach it and restore your vehicle’s interior to its former glory. Follow these steps to ensure a smooth and wrinkle-free reattachment process.
Starting from one end and working across
To begin reattaching the headliner, start at one end and work your way across. This approach helps maintain an even tension and ensures that the fabric is properly aligned. It also prevents any unnecessary stretching or pulling that could lead to wrinkles or bubbles.
Smoothing out any wrinkles or bubbles
As you reattach the headliner, be on the lookout for any wrinkles or bubbles that may appear. These imperfections can be unsightly and detract from the overall appearance of your car’s interior. Thankfully, they can be easily corrected.
To smooth out wrinkles or bubbles, gently pull the fabric taut in the affected area. Use your hands or a soft cloth to press the fabric against the adhesive, smoothing it out as you go. Take your time and work slowly to avoid creating additional wrinkles or damaging the fabric.
If there are stubborn wrinkles or bubbles that won’t go away with gentle pressure, you can use a heat gun or hairdryer on a low setting to help relax the fabric. Be careful not to overheat the fabric or the adhesive, as this could cause damage.
Remember, the goal is to achieve a smooth and seamless finish. Take your time and make sure to address any wrinkles or bubbles as you go along. This will ensure that your headliner looks professional and well-executed.
By following these steps, you can successfully reattach your headliner and restore its original appearance. With a little patience and attention to detail, you’ll have a sag-free headliner that enhances the overall look and feel of your car’s interior. So, grab your tools and get ready to enjoy a rejuvenated and comfortable ride!
Finalizing the Headliner Repair
After successfully removing and cleaning the sagging headliner, it’s time to put the finishing touches on the repair process. This final stage involves trimming any excess fabric if necessary and reinstalling any accessories or fixtures that were previously removed.
Trimming Excess Fabric if Necessary
Once the adhesive has dried and the headliner is securely attached to the roof, you may notice some excess fabric that needs to be trimmed. This excess fabric can create a bulky appearance and potentially interfere with the proper fit of the headliner.
To trim the excess fabric, you’ll need a sharp pair of scissors or a utility knife. Carefully and slowly trim away the excess fabric, making sure to follow the shape of the headliner and avoid cutting into the roof or damaging the surrounding area. Take your time and make small, precise cuts to achieve a clean and seamless result.
Reinstalling Accessories or Fixtures Removed Earlier
During the headliner repair process, it’s common to remove any accessories or fixtures that are attached to the headliner. This includes items such as interior lights, sun visors, and grab handles. Now that the headliner is back in place, it’s time to reinstall these components.
Begin by identifying the locations where each accessory or fixture needs to be reattached. Check for any screw holes or mounting points on the headliner and align them with the corresponding parts on the accessories. Use the appropriate screws or fasteners to securely reattach each item, ensuring a snug and stable fit.
As you reinstall the accessories, take the opportunity to inspect them for any signs of wear or damage. Replace any worn-out components to ensure the longevity of your headliner and prevent future issues.
By trimming excess fabric and reinstalling accessories or fixtures, you’ll achieve a professional and polished finish to your headliner repair. These final steps not only enhance the appearance of your vehicle’s interior but also contribute to the overall functionality and comfort of the headliner.
Remember, a well-maintained headliner can significantly improve your driving experience by providing a clean and visually appealing cabin. So take the time to complete these final steps and enjoy the satisfaction of a successful headliner repair.
Preventing Future Sagging
Regularly inspecting and maintaining headliner
Regular inspection and maintenance of your headliner can help prevent future sagging and ensure its longevity. Here are some steps you can take to keep your headliner in good condition:
- Visual inspection: Regularly check the condition of your headliner for any signs of sagging or damage. Look for any visible drooping or sagging, as well as any loose or detached areas.
- Touch test: Gently press on different areas of the headliner to check for any soft spots or areas that feel loose. This can help identify weak spots that may lead to sagging in the future.
- Clean regularly: Dust, dirt, and debris can accumulate on the headliner over time, which can weaken the adhesive and contribute to sagging. Regularly vacuuming off dust and debris can help maintain the cleanliness of the headliner.
- Avoid harsh cleaning agents: When cleaning the headliner, use a mild detergent solution and a soft cloth. Harsh cleaning agents or abrasive materials can damage the fabric and adhesive, making it more prone to sagging.
- Handle with care: Be gentle when handling items near the headliner, such as sun visors or overhead lights. Rough handling or pulling on these items can put strain on the headliner and cause it to sag.
Avoiding extreme temperature and moisture exposure
Extreme temperature and moisture exposure can also contribute to headliner sagging. Here are some tips to help protect your headliner from these factors:
- Park in shaded areas: Whenever possible, park your vehicle in shaded areas to minimize exposure to direct sunlight. Prolonged exposure to high temperatures can weaken the adhesive and cause the headliner to sag.
- Use sunshades: When parking in sunny areas, use sunshades on your windshield and windows to reduce heat buildup inside the vehicle. This can help alleviate the stress on the headliner caused by extreme heat.
- Address leaks promptly: If you notice any leaks in your vehicle, particularly in the roof area, it’s important to address them promptly. Water can seep into the headliner and weaken the adhesive, leading to sagging. Have any leaks repaired as soon as possible to prevent further damage.
- Proper ventilation: Ensure proper ventilation in your vehicle to minimize moisture buildup. Excess moisture can promote the growth of mold and mildew, which can damage the headliner. Use air conditioning or open windows to maintain adequate airflow.
- Avoid wet items: Avoid placing wet or damp items on the headliner, as moisture can seep into the fabric and adhesive. If you need to transport wet items, make sure they are properly contained and secured to prevent any contact with the headliner.
By regularly inspecting and maintaining your headliner and taking precautions to avoid extreme temperature and moisture exposure, you can help prevent sagging and prolong the lifespan of your headliner. Taking these simple steps can save you the hassle and expense of headliner repairs in the future.
Troubleshooting Common Issues
Headliner still sagging after repair
Is your headliner still sagging even after following the repair process? Don’t worry, there could be a few reasons why this might be happening. Let’s explore some troubleshooting steps to help you fix this issue.
Check for Proper Adhesive Application
One possible reason for the headliner to continue sagging is improper adhesive application. Make sure that you have applied the adhesive evenly on both the headliner fabric and the roof. Uneven application can result in weak adhesion, leading to the headliner sagging again.
Inspect the Quality of Adhesive
The type of adhesive used is crucial for a successful headliner repair. Ensure that you have chosen the right adhesive type that is suitable for your headliner material and the roof surface. Some adhesives may not provide strong enough bonding, causing the headliner to sag again.
Evaluate the Condition of the Headliner Fabric
If the headliner fabric is old, worn out, or damaged, it might not be able to hold the adhesive properly. In such cases, even a well-executed repair may not be able to prevent the headliner from sagging again. Consider replacing the fabric if it is in poor condition.
Adhesive not holding properly
Are you facing issues with the adhesive not holding properly during the headliner repair process? Let’s troubleshoot this problem and find a solution.
Assess the Condition of the Roof Surface
Before applying adhesive, ensure that the roof surface is clean, dry, and free from any contaminants. Dust, grease, or moisture can compromise the adhesive’s ability to bond effectively. Thoroughly clean the surface and remove any residue to improve the adhesive’s grip.
Check Adhesive Drying Time
Different adhesives have varying drying times. It’s essential to allow the adhesive sufficient time to dry and cure properly. Rushing the process or not allowing enough drying time can result in weak adhesion, causing the headliner to detach or sag. Follow the manufacturer’s instructions for the recommended drying time.
Consider the Temperature and Humidity Conditions
Extreme temperature and humidity can affect the adhesive’s performance. If the repair is being done in extreme heat or high humidity, it may impact the adhesive’s ability to bond effectively. Try to work in a controlled environment with moderate temperature and humidity levels for optimal results.
Remember, troubleshooting headliner issues requires patience and attention to detail. By following these troubleshooting steps, you can identify the root cause of the problem and find the appropriate solution to ensure your headliner stays firmly in place.