
Discover the function and of a vapor canister purge solenoid, signs of issues, how to test and replace it, and essential maintenance tips for optimal performance.
What is a Vapor Canister Purge Solenoid?
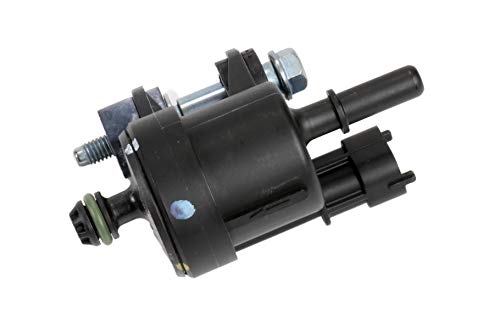
The vapor canister purge solenoid is an essential component of a vehicle’s evaporative emission control system. It plays a crucial role in reducing harmful emissions and ensuring the proper functioning of the vehicle’s fuel system.
Function of a Vapor Canister Purge Solenoid
The main of a vapor canister purge solenoid is to control the flow of fuel vapor from the fuel tank to the engine. It acts as a valve that opens and closes, allowing the vapors to be drawn into the engine intake manifold during certain driving conditions. By doing so, it prevents the fuel vapors from escaping into the atmosphere.
Importance of a Vapor Canister Purge Solenoid
The vapor canister purge solenoid is an important component because it helps in maintaining the overall performance and efficiency of the vehicle. Here are a few key reasons why the vapor canister purge solenoid is important:
- Emission Control: The vapor canister purge solenoid plays a crucial role in reducing harmful emissions. It ensures that the fuel vapors are properly controlled and directed back into the engine to be burned, rather than being released into the air.
- Fuel Efficiency: By controlling the flow of fuel vapors, the vapor canister purge solenoid helps in optimizing the fuel-air mixture in the engine. This, in turn, improves fuel efficiency and helps in saving fuel costs.
- Engine Performance: A faulty vapor canister purge solenoid can negatively impact the engine’s performance. It can cause rough idling, stalling, and decreased power output. Therefore, ensuring the proper functioning of the solenoid is essential for maintaining smooth engine performance.
In summary, the vapor canister purge solenoid is a vital component that helps in reducing emissions, improving fuel efficiency, and maintaining engine performance. Understanding its function and can assist vehicle owners in recognizing the significance of regular maintenance and addressing any issues that may arise.
Signs of a Faulty Vapor Canister Purge Solenoid
Check Engine Light Illuminates
One of the most common signs of a faulty vapor canister purge solenoid is when the check engine light illuminates on your dashboard. This warning light is connected to your vehicle’s onboard diagnostic (OBD) system, which constantly monitors various components and systems for any issues. When the OBD system detects a problem with the vapor canister purge solenoid, it triggers the check engine light to alert you.
Rough Idle or Stalling
Another indication of a faulty vapor canister purge solenoid is experiencing a rough idle or stalling of your vehicle’s engine. The solenoid is responsible for controlling the flow of fuel vapors from the charcoal canister to the engine intake manifold. If the solenoid is not functioning properly, it can lead to an imbalance in the air-fuel mixture, causing the engine to run rough or even stall.
Fuel Odor
A noticeable fuel odor, especially around the rear of your vehicle, can be a sign of a faulty vapor canister purge solenoid. The solenoid plays a crucial role in preventing fuel vapors from escaping into the atmosphere. If it fails to close properly, fuel vapors can leak out, resulting in a strong smell of gasoline. Not only is this unpleasant, but it also poses a potential safety hazard.
Decreased Fuel Efficiency
A decrease in fuel efficiency can also indicate a problem with the vapor canister purge solenoid. When the solenoid is faulty, it may not be able to properly regulate the flow of fuel vapors, leading to an inefficient combustion process. As a result, your vehicle may consume more fuel than usual, causing a decrease in miles per gallon (MPG). If you notice a sudden drop in fuel efficiency, it’s worth checking the condition of the solenoid.
In summary, if you experience any of these signs – an illuminated check engine light, rough idle or stalling, fuel odor, or decreased fuel efficiency – it is likely that your vapor canister purge solenoid is faulty. It’s important to address these issues promptly to prevent further damage to your vehicle’s engine and to ensure optimal performance.
Common Causes of Vapor Canister Purge Solenoid Issues
Clogged or Faulty Canister
The vapor canister purge solenoid is an essential component of the vehicle’s evaporative emission control system. Its main is to regulate the flow of fuel vapors from the charcoal canister to the engine intake manifold. However, there are several common causes that can lead to issues with the vapor canister purge solenoid.
One of the primary causes is a clogged or faulty canister. Over time, the charcoal canister can become clogged with debris or contaminants, hindering the proper flow of fuel vapors. This can result in an inefficient purge cycle, leading to various problems such as rough idle, decreased fuel efficiency, or even stalling.

To prevent this issue, regular inspection and cleaning of the canister are crucial. It is recommended to follow the manufacturer’s maintenance schedule and replace the canister if it is clogged or damaged beyond repair.
Vacuum Leaks
Another common cause of vapor canister purge solenoid issues is vacuum leaks. The solenoid relies on a vacuum pressure to operate effectively. If there are any leaks in the vacuum lines or connections, the solenoid may not function properly, leading to an imbalance in the fuel vapor flow.
Vacuum leaks can occur due to various reasons, such as deteriorated or cracked hoses, loose connections, or faulty seals. These leaks can disrupt the vacuum pressure required for the solenoid to open and close effectively, resulting in issues like rough idle or even a check engine light.
To diagnose and fix vacuum leaks, a thorough inspection of the vacuum lines and connections is necessary. Any damaged or deteriorated components should be replaced, and all connections should be securely tightened. Regularly checking for loose or damaged hoses can help prevent vacuum leaks and maintain the proper functioning of the vapor canister purge solenoid.
Electrical Problems
Electrical problems can also contribute to vapor canister purge solenoid issues. The solenoid relies on electrical signals to open and close, controlling the flow of fuel vapors. If there are any faults in the electrical system, such as a damaged wiring harness or a faulty solenoid valve, it can disrupt the solenoid’s operation.
Common symptoms of electrical problems with the vapor canister purge solenoid include a check engine light illumination, rough idle, or stalling. These issues may arise due to a broken or corroded wire, a faulty solenoid valve, or a malfunctioning control module.

When troubleshooting electrical problems, it is essential to inspect the wiring harness for any visible damage or loose connections. If any issues are found, they should be repaired or replaced accordingly. Additionally, using a multimeter to test the continuity and resistance of the electrical components can help pinpoint the exact cause of the problem.
How to Test a Vapor Canister Purge Solenoid
If you suspect that your vapor canister purge solenoid may be faulty, it’s important to perform some tests to confirm the issue. In this section, we will discuss two methods to test the vapor canister purge solenoid: using a scan tool and testing for proper vacuum.
Using a Scan Tool
Using a scan tool is one of the easiest and most effective ways to test a vapor canister purge solenoid. Here are the steps to follow:
- Connect the scan tool: Start by locating the diagnostic connector, which is usually located under the dashboard. Connect the scan tool to the diagnostic connector using the provided cable.
- Access the vehicle’s computer: Once the scan tool is connected, turn on the ignition without starting the engine. The scan tool will communicate with the vehicle’s computer and retrieve any stored trouble codes.
- Check for codes related to the vapor canister purge solenoid: Look for any trouble codes that are specifically related to the vapor canister purge solenoid. These codes may indicate a malfunction or a fault in the solenoid.
- Clear the trouble codes: If you find any codes related to the solenoid, you can choose to clear them using the scan tool. However, it is recommended to note down the codes before clearing them, as they can provide valuable information for further diagnosis.
Testing for Proper Vacuum
Testing for proper vacuum is another method to determine the functionality of a vapor canister purge solenoid. Here’s how you can do it:
- Locate the vapor canister purge solenoid: The solenoid is usually located near the charcoal canister, which is often found in the engine bay or near the fuel tank. Refer to your vehicle’s manual or consult a professional if you’re having trouble finding it.
- Inspect the vacuum lines: Check the vacuum lines connected to the solenoid for any signs of damage, leaks, or blockages. A damaged or disconnected vacuum line can affect the solenoid’s operation.
- Disconnect the vacuum line: Once you have located the vacuum line connected to the solenoid, disconnect it carefully. Be prepared for any fuel vapors or residual pressure that may be released.
- Check for suction: With the vacuum line disconnected, start the engine and place your finger or a small piece of paper over the open end of the vacuum line. You should feel a strong suction or see the paper being pulled towards the line. This indicates that the solenoid is creating proper vacuum.
- Reconnect the vacuum line: After testing for proper vacuum, make sure to reconnect the vacuum line securely. Failure to do so can lead to vacuum leaks and affect the performance of the solenoid.
By following these testing methods, you can determine whether your vapor canister purge solenoid is functioning properly or if it requires further inspection or replacement. Remember, if you’re unsure or uncomfortable performing these tests yourself, it’s always best to consult a qualified mechanic for assistance.
Steps to Replace a Vapor Canister Purge Solenoid
The vapor canister purge solenoid plays a crucial role in the proper functioning of your vehicle’s emission control system. Over time, it may become faulty and need to be replaced. If you’re experiencing issues with your vapor canister purge solenoid, here are the steps you can follow to it.
Locate the Solenoid
Before you can replace the vapor canister purge solenoid, you need to locate its position in your vehicle. The solenoid is usually located near the fuel tank or in the engine compartment. To find it, you can refer to your vehicle’s manual or do a quick search online for the specific location in your make and model.
Disconnecting the Solenoid
Once you have located the solenoid, the next step is to disconnect it from the vehicle’s electrical system. Start by disconnecting the negative terminal of the battery to ensure your safety. This will prevent any accidental electrical discharge during the replacement process.
After disconnecting the battery, you can proceed to disconnect the wiring harness connected to the solenoid. Carefully remove any clips or connectors that hold the harness in place. Take note of the wire connections and their positions to ensure you can reconnect them correctly later on.
Next, you’ll need to disconnect the vacuum lines attached to the solenoid. These lines are responsible for controlling the flow of vapor from the canister. Gently remove the clamps or connectors securing the lines and carefully detach them from the solenoid. Be cautious not to damage the lines or fittings during this process.
Installing the New Solenoid
With the old solenoid disconnected, it’s time to install the new one. Start by attaching the vacuum lines back onto the new solenoid. Ensure a secure fit by tightening any clamps or connectors that hold the lines in place. Double-check that the lines are properly aligned with the solenoid to prevent any leaks or malfunctions.
Next, reconnect the wiring harness to the new solenoid. Match the wire connections with their respective positions as you noted earlier. Make sure each connector is securely fastened to guarantee a reliable electrical connection.
Once the wiring harness is connected, you can now reattach the negative terminal of the battery. This will restore power to the vehicle’s electrical system.
Congratulations! You have successfully replaced the vapor canister purge solenoid in your vehicle. However, it’s essential to test the new solenoid to ensure everything is functioning correctly. Refer to the appropriate section on how to test a vapor canister purge solenoid to ensure its proper operation.
Remember, if you’re unsure about any step in the replacement process, it’s always best to consult a professional mechanic for assistance. They have the expertise and experience to guide you through the process and ensure the job is done correctly.
Preventive Maintenance for Vapor Canister Purge Solenoid
Regular maintenance and inspections play a crucial role in ensuring the optimal performance and longevity of your vapor canister purge solenoid. By following a few simple steps, you can keep your solenoid in top shape and avoid potential issues down the road.
Regular Inspection and Cleaning
One of the most important aspects of preventive maintenance for your vapor canister purge solenoid is regular inspection. By visually inspecting the solenoid, you can identify any signs of wear, damage, or buildup that may hinder its functionality.
During the inspection, look for any cracks, leaks, or loose connections in the hoses and fittings connected to the solenoid. These can lead to vacuum leaks and affect the overall performance of the solenoid. Additionally, check for any signs of corrosion or dirt accumulation on the solenoid itself.
Cleaning the solenoid is another essential step in preventive maintenance. Over time, the solenoid may accumulate dirt, debris, or carbon deposits, which can interfere with its proper functioning. To clean the solenoid, use a mild cleaning solution and a soft brush or cloth to gently remove any buildup. Be careful not to damage any delicate components during the cleaning process.
Checking for Loose Connections
Loose connections can significantly impact the performance of your vapor canister purge solenoid. It’s important to regularly check and ensure that all connections, hoses, and fittings are securely tightened. Loose connections can cause vacuum leaks and compromise the proper functioning of the solenoid.
Inspect each connection point and gently tighten any loose fittings. Pay close attention to the hoses connected to the solenoid and ensure they are properly secured. A simple visual inspection and tightening of connections can go a long way in preventing potential issues with your vapor canister purge solenoid.
By incorporating regular inspection and cleaning into your preventive maintenance routine, as well as checking for loose connections, you can ensure that your vapor canister purge solenoid operates smoothly and efficiently. These simple steps will help you extend the lifespan of your solenoid and prevent costly repairs in the future.
Frequently Asked Questions about Vapor Canister Purge Solenoid
How long does a vapor canister purge solenoid last?
The lifespan of a vapor canister purge solenoid can vary depending on several factors, such as the quality of the solenoid, driving conditions, and maintenance. On average, a well-maintained solenoid can last anywhere from 80,000 to 150,000 miles. However, it’s important to note that solenoids can fail prematurely due to various reasons, so regular inspection and maintenance are crucial to ensure their longevity.
Can I drive with a faulty vapor canister purge solenoid?
While it is technically possible to drive with a faulty vapor canister purge solenoid, it is not recommended. The solenoid plays a vital role in the emission control system of your vehicle. A faulty solenoid can lead to various issues, such as increased emissions, decreased fuel efficiency, and potential damage to other components. Additionally, driving with a malfunctioning solenoid may result in a failed emissions test and legal consequences in areas with strict emissions regulations. It is always best to address any issues with the solenoid as soon as possible to avoid further complications.
Can a vapor canister purge solenoid be repaired?
In some cases, a vapor canister purge solenoid can be repaired, depending on the specific issue it is experiencing. Simple problems like loose connections or minor electrical faults can often be fixed without the need for a full replacement. However, if the solenoid is severely damaged or has internal mechanical issues, it may need to be replaced entirely. It is recommended to have a professional mechanic diagnose the problem with the solenoid and determine if it can be repaired or if a replacement is necessary. Attempting to repair the solenoid without proper knowledge and tools can lead to further damage and potentially compromise the performance of your vehicle’s emission control system.